
.
Table of Contents | ||||
|---|---|---|---|---|
|
| Info | ||
|---|---|---|
| ||
In the downloadable ExcelWriter_Basic_Tutorials.zip, there is a completed template file located in CompleteFinancialReport/templates/Part1_Financial_Template.xlsx. |
In this tutorial ExcelTemplate is being used to populate data and ExcelApplication is being used to format the dataperform some formatting. This part of the tutorial will make use of data marker modifiers.
| Note |
|---|
This example assumes an understanding of ExcelTemplate. If you are not familiar with how to set up an Excel template with data markers, please go through the Simple Expense Summary first. |
Here is the starting template: 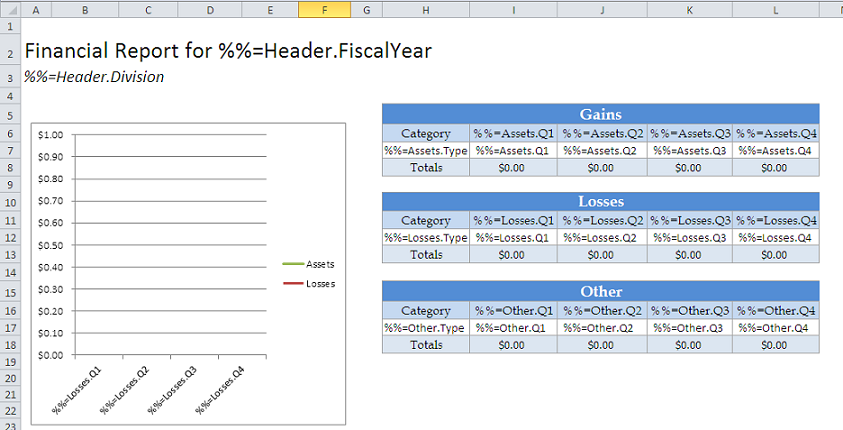
The next few steps will show the process of adding using ordinal syntax and data marker modifiers.
ExcelTemplate supports the normally requires the data marker for a column of data to specify the data set and the column name (e.g. %%=DataSource.ColumnName). In the event that the column name or data source name is unknown, ExcelWriter supports the use of ordinal numbering based on the data source column.
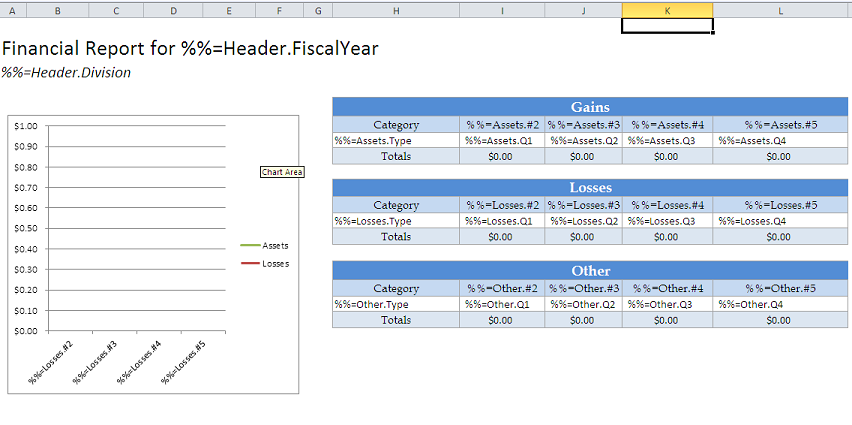
Instead of binding to to a specific column name, "%%=Assets.Q1", the data marker can bind to column name can be replaced with ordinal syntax, "%%=Assets.#2". This denotes the second column in the 'Assets' data set with the syntax . The data set name can also be replaced, "%%=Assets#3.#2." Note that the hash (#) indicates ordinal syntax. An example is , which denotes the second column from the third data source bound to the template.
However, in this example, we will only change the column name, as shown below:
This template uses two different data marker modifiers - fieldname and optional. Modifiers are added in parentheses at the end of a data marker. They alter the binding behavior of the data marker.
...
After the modifiers are added, the template should resemble this: 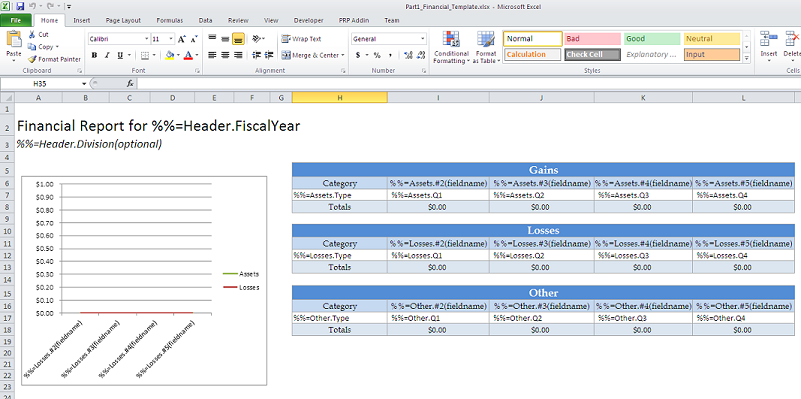
| Info | ||
|---|---|---|
| ||
In the sample code, the reference to SoftArtisans.OfficeWriter.ExcelWriter.dll has already been added to the CompleteFinancialReport project. |
...
1. Include the SoftArtisans.OfficeWriter.ExcelWriter namespace in the code behind
...
| Code Block |
|---|
DataBindingProperties dataProps = XLT.CreateDataBindingProperties(); |
1.Get the data for the Assets, Losses, and Other datasets
...
The final output should look something like this: 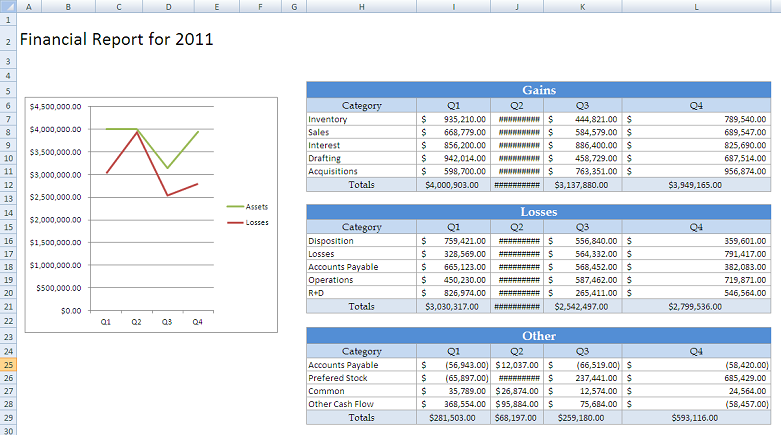
| Code Block |
|---|
using SoftArtisans.OfficeWriter.ExcelWriter;
...


//Instantiate the template object
ExcelTemplate XLT = new ExcelTemplate();
//Open the file
XLT.Open(Page.MapPath("//templates//Part1_Financial_Template.xlsx"));


//Create data binding properties
DataBindingProperties bindingProps = XLT.CreateDataBindingProperties();


//Get the data from the CSVs. More info about the generic parser is available
//in the project and in the tutorial above.
DataTable dtAssets = GetCSVData("//data//Assets.csv");
DataTable dtLosses = GetCSVData("//data//Losses.csv");
DataTable dtOther = GetCSVData("//data//Other.csv");


//Declare the row data. This tutorial uses a single item array to demonstrate the
//optional modifier
string\[\] headerValues = { "2011" };
string\[\] headerNames = { "FiscalYear" };


//Bind each datatable
XLT.BindData(dtAssets, "Assets", bindingProps);
XLT.BindData(dtLosses, "Losses", bindingProps);
XLT.BindData(dtOther, "Other", bindingProps);

//Bind the single row data
XLT.BindRowData(headerValues, headerNames, "Header", bindingProps);


//Call process to import data to file
XLT.Process();


//Save the file
XLT.Save(Page.Response, "temp.xlsx", false);
|
You can download the code for the Financial Report here.