Hello World with ExcelApplication
ExcelWriter's ExcelApplication approach provides you with full programmatic control over the Excel file formats (XLS, XLSX, XLSM). This includes the ability to create and modify: charts, formulas, formatting, data validation, conditional formatting, worksheet protection, images and more! This tutorial will show you how to create a new workbook and write a value to a cell.
Diving right into the code
| Info |
|---|
In the _Hello World_ sample web application, ExcelApplication_HelloWorld.aspx has a text box for users to supply a value and ExcelApplication_HelloWorld.aspx.cs/vb contains the code shown below. |
Include the SoftArtisans.OfficeWriter.ExcelWriter namespace in the code behind.
| Code Block |
|---|
|
using SoftArtisans.OfficeWriter.ExcelWriter; |
| Code Block |
|---|
|
Imports SoftArtisans.OfficeWriter.ExcelWriter |
Instantiate the ExcelApplication object
| Code Block |
|---|
|
ExcelApplication XLAPP = new ExcelApplication(); |
| Code Block |
|---|
|
Dim XLAPP As New ExcelApplication() |
Unlike the ExcelTemplate object, which represents a single file, the ExcelApplication works as a file generation engine. The ExcelApplication object can be used to create, open, and save multiple workbooks.
Create a new workbook with ExcelApplication.Create(FileFormat)
| Code Block |
|---|
|
Workbook WB = XLAPP.Create(ExcelApplication.FileFormat.Xlsx); |
| Code Block |
|---|
|
Dim WB As Workbook = XLAPP.Create(ExcelApplication.FileFormat.Xlsx) |
ExcelWriter has the ability to create Excel 2003 (XLS) files and Excel 2007 (XLSX) files, but cannot convert between formats. The file format must be declared when the workbook is created and the file extension of the output file must match when the file is saved.
ExcelApplication.Create(FileFormat) automatically creates the first worksheet in the workbook for you.
Access the first worksheet through the Workbook.Worksheets collection
| Code Block |
|---|
|
Worksheet WKST = WB.Worksheets[0]; |
| Code Block |
|---|
|
Dim WKST As Worksheet = WB.Worksheets(0) |
You can access worksheets by name (e.g. "Sheet1") or by index (shown above), but ExcelWriter will throw an exception if you attempt to access a worksheet that does not exist.
Write the value from the web form into a cell
| Code Block |
|---|
|
string value = DataValueBox.Text.Trim();
WKST.Cells[0,0].Value = value; |
| Code Block |
|---|
|
Dim value As String = DataValueBox.Text.Trim()
WKST.Cells(0, 0).Value = value |
It is important to note that ExcelWriter indices are all 0-indexed, unlike Excel indices, which are 1-indexed. This is importing when working with cells, rows, columns, and worksheet positions in ExcelWriter. You can also reference cells by name; in this case, it would be "A1".
Save the workbook
| Code Block |
|---|
|
XLAPP.Save(WB, Page.Response, "Output.xlsx", false); |
| Code Block |
|---|
|
XLAPP.Save(WB, Page.Response, "Output.xlsx", False) |
ExcelApplication.Save has the same output options as ExcelTemplate: save to disk, save to memory stream, stream back to the client inline, and stream back to the client as an attachment. In this case, we're streaming the workbook back to the client as an attachment. Remember that the file extension must match the file format specified when the workbook was created.
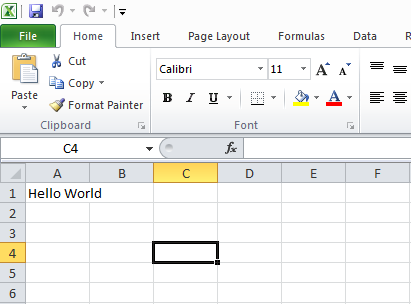
Run the code. In the output file, you will see that the custom text from the form has been inserted into cell "A1".
Final Code
| Code Block |
|---|
|
using SoftArtisans.OfficeWriter.ExcelWriter;
...
ExcelApplication XLAPP = new ExcelApplication();
Workbook WB = XLAPP.Create(ExcelApplication.FileFormat.Xlsx);
Worksheet WKST = WB.Worksheets[0];
string value = DataValueBox.Text.Trim();
WKST.Cells[0,0].Value = value;
XLAPP.Save(WB, Page.Response, "Output.xlsx", false); |
| Code Block |
|---|
|
Include SoftArtisans.OfficeWriter.ExcelWriter
...
Dim XLAPP As New ExcelApplication()
Dim WB As Workbook = XLAPP.Create(ExcelApplication.FileFormat.Xlsx)
Dim WKST As Worksheet = WB.Worksheets(0)
Dim value As String = DataValueBox.Text.Trim()
WKST.Cells(0, 0).Value = value
XLAPP.Save(WB, Page.Response, "Output.xlsx", False) |
Downloads
You can download the code for the _Hello World_ tutorial as a Visual Studio solution.
