
.
Table of Contents | ||||
|---|---|---|---|---|
|
An A PowerPointWriter template is an a PowerPoint presentation that contains PowerPointWriter data markers. A data marker is a line of text beginning with %%= that specifies a database column, variable, or array to insert into the presentation. PowerPointWriter supports data markers embedded in text. Data markers are added to a presentation in PowerPoint and then bound to data sources in code. PowerPointWriter populates the data markers with values from the data sources when the code is executed.
| Excerpt |
|---|
This Part 1 of this tutorial demonstrates how to use data markers to import single and multiple rows of data, using the repeat slide marker, and removing slides. |
The basic syntax for a data marker is %%=[DataSourceName].[ColumnName], where DataSourceName is the name of the data source and ColumnName is the name of the column in the data source. You need to follow these rules when naming data markers:
[ ]) are optional, but must be used when the data marker contains spaces or Unicode characters ColumnName must be [Street Address] to account for the space. Similarly, if a data source name is "DataSource1", the data marker name must be DataSource1 or [DataSource1].For more specific information about creating data markers, see How to use Data Markers
Our The template for Part 1 consists of 5 2 slides populated with text and data markers.
| Info | ||
|---|---|---|
| ||
In the downloadable SomeFileNamePowerPointWriter_BasicTutorials.zip under ProjectProposal, there is a completed template file located in ProjectProposal/templates/part1_template.pptx. |
...
...
...
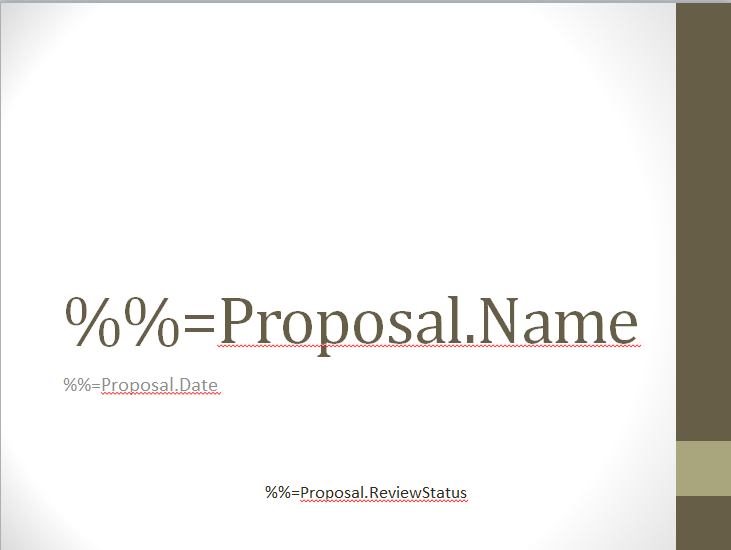
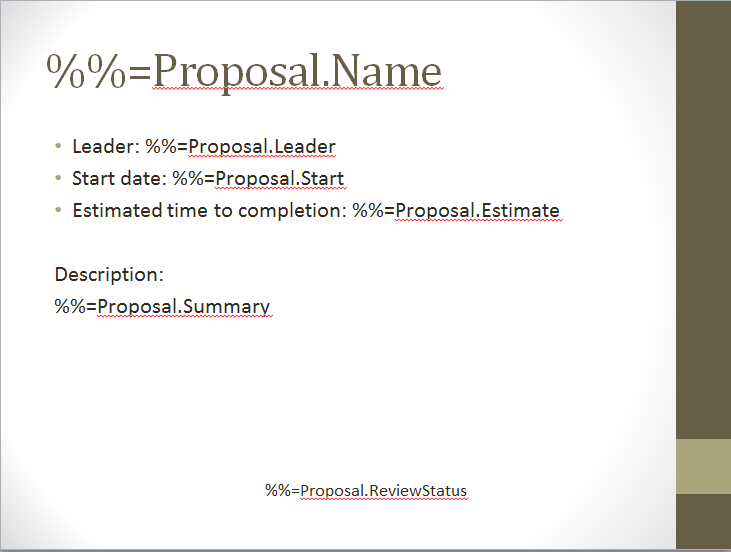
%%=Proposal.Name. When the template is processed, this data marker will get the value from the 'Name' column in the 'Proposal' data source. 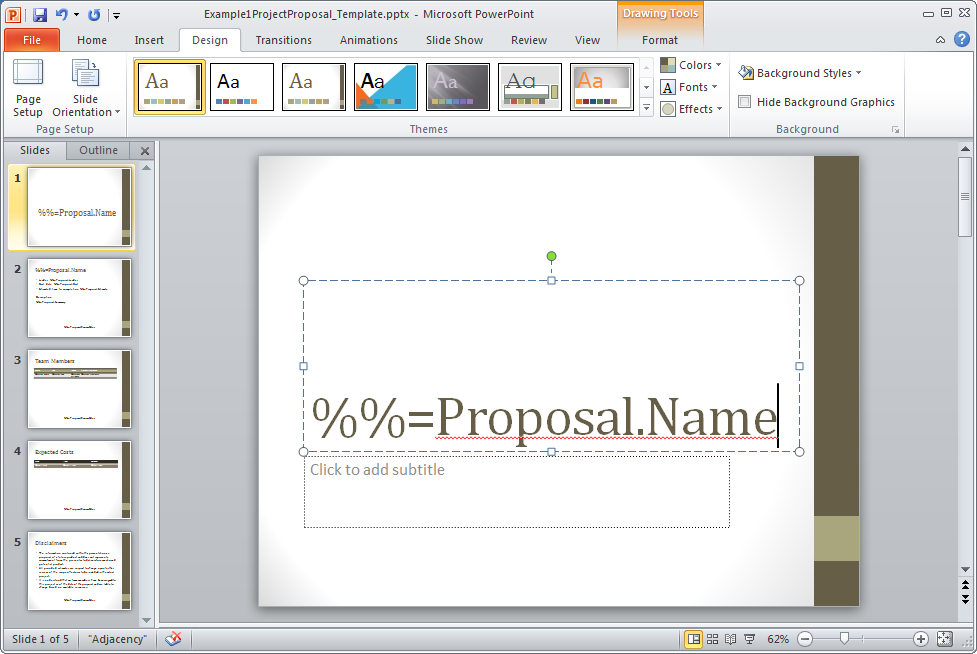
...
...
%%=Proposal.Date...
%%=Proposal.ReviewStatus...
...
...
...
...
...
...
...
...
These will contain additional data about our project. PowerPointWriter supports data markers embedded in text, we so only need one text box for this information.In this section, we are only importing single rows of data. Importing multiple rows will be handled in part 2. is needed for all of our data markers.
The finished slide should look like the one below.
| Info | ||
|---|---|---|
| ||
In the sample code, the reference to SoftArtisans.OfficeWriter.PowerPointWriter.dll has already been added to the ProjectProposal project. |
...
| Info | ||
|---|---|---|
| ||
There is a sample web application page |
...
| Code Block |
|---|
using SoftArtisans.OfficeWriter.PowerPointWriter;
|
...
PowerPointTemplate object. | Code Block |
|---|
PowerPointTemplate |
...
pptt = new PowerPointTemplate(); |
| Code Block |
|---|
pptt.Open(Page.MapPath("//templates//part1_template.pptx"));
|
| Code Block |
|---|
DataBindingProperties dataProps = pptt.CreateDataBindingProperties();
|
| Code Block |
|---|
//The values to display
//This presentation is for a project proposal for a surgery scheduling software
object[] valuesArray = { "Surgery Schedule", "January 1, 2014", "Under Review", "Pamela Blythe", "January 1, 2015", "6 months", "Software to schedule surgeries that require multiple resources such as surgeons, assistants, nurses, pre-op and post-op space, surgery theater, long-term recovery rooms." };
|
| Code Block |
|---|
//The column names are the same as the data markers
string[] columnNamesArray = { "Name", "Date", "ReviewStatus", "Leader", "Start", "Estimate", "Summary" };
|
| Code Block |
|---|
pptt.BindData(valuesArray, columnNamesArray, "Proposal", dataProps);
|
| Code Block |
|---|
pptt.Process();

//Stream the output in the response as an attachment
pptt.Save(Page.Response, "Part1_Output.xlsx", false);
|
You have now completed part 1 of the PowerPointWriter Project Proposal tutorial.
| Code Block |
|---|
PowerPointTemplate pptt = new PowerPointTemplate();
pptt.Open(Page.MapPath("//templates//part1_template.pptx"));
DataBindingProperties dataProps = pptt.CreateDataBindingProperties();
object[] valuesArray = { "Surgery Schedule", "January 1, 2014", "Under Review", "Pamela Blythe", "January 1, 2015", "6 months", "Software to schedule surgeries that require multiple resources such as surgeons, assistants, nurses, pre-op and post-op space, surgery theater, long-term recovery rooms." };
string[] columnNamesArray = { "Name", "Date", "ReviewStatus", "Leader", "Start", "Estimate", "Summary" };
pptt.BindData(valuesArray, columnNamesArray, "Proposal", dataProps);
pptt.Process();
pptt.Save(Page.Response, "Part1_Output.xlsx", false)
|
You can download the code for the Basic PowerPointWriter Tutorials as a Visual Studio solution, which includes the Project Proposal.