
.
...
| Note |
|---|
This tutorial assumes a basic understanding of the |
| Note |
|---|
There is only 1 part to this tutorial. |
The WordTemplate object is used for template-driven document generation. This object opens a WordWriter template file, populates it with data from a specified data source, and generates a new Word document. The WordTemplate object provides the ability to import multiple rows of data by repeating sections of a document for each row, or using the entire document as a repeatable section.
...
| Info | ||
|---|---|---|
| ||
In the downloadable WordWriter_Basic_Tutorials.zip, there is a completed template file located in BusinessLabels/templates/Business_Label_Template.docx. |
...
1. Include the SoftArtisans.OfficeWriter.WordWriter namespace in the code behind
| Code Block |
|---|
using SoftArtisans.OfficeWriter.WordWriter;
|
2. Create a new WordTemplate object and open the template file.
| Code Block |
|---|
WordTemplate WT = new WordTemplate();
WT.Open(Page.MapPath("//templates//Business_Label_template.docx"));
|
...
This call is to a helper method GetCSVData that parses the CSV files and returns a DataTable with the values.
| Code Block |
|---|
DataTable dtBusinessLabels = GetCSVData("//data//BusinessLabelTutorialData.csv");
|
...
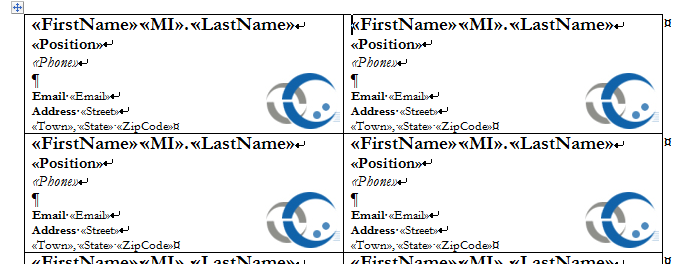
Recall that SetMailMerge treats the entire document as a repeat block. This means that the merge fields in the document will need to match the column names of the data source. If there are any stray merge fields in the document, WordWriter will throw an error.
| Code Block |
|---|
WT.SetMailMerge(dtBusinessLabels);
|
5. Process and save the template file.
| Code Block |
|---|
WT.Process();
WT.Save(Page.Response, "Business_Label_Output.docx", false);
|
The completed code should look like this:
| Code Block |
|---|
//Instantiate a new WordTemplate object
WordTemplate WT = new WordTemplate();

//Open the template file
WT.Open(Page.MapPath("//templates//Business_Label_template.docx"));

//Get the order info datatable using GenericParser
DataTable dtBusinessLabels = GetCSVData("//data//BusinessLabelTutorialData.csv");

//Set the data sources to import a single row of data for each source
WT.SetMailMerge(dtBusinessLabels);

//Process to import the data to the template
WT.Process();

WT.Save(Page.Response, "Business_Labels_Output.docx", false);
|
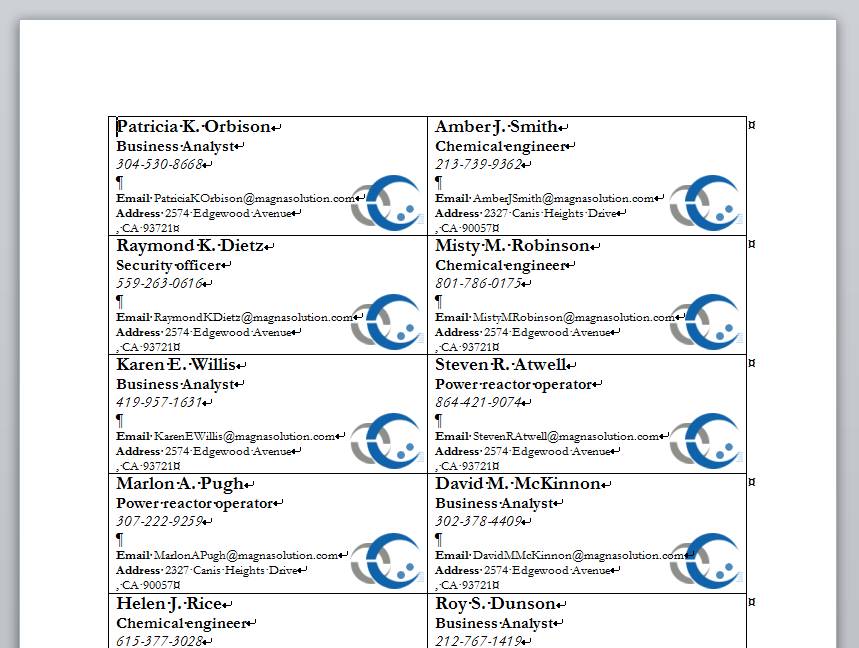
Run the code. You will notice that each employee has a page of business label's labels with that particular employee's data.
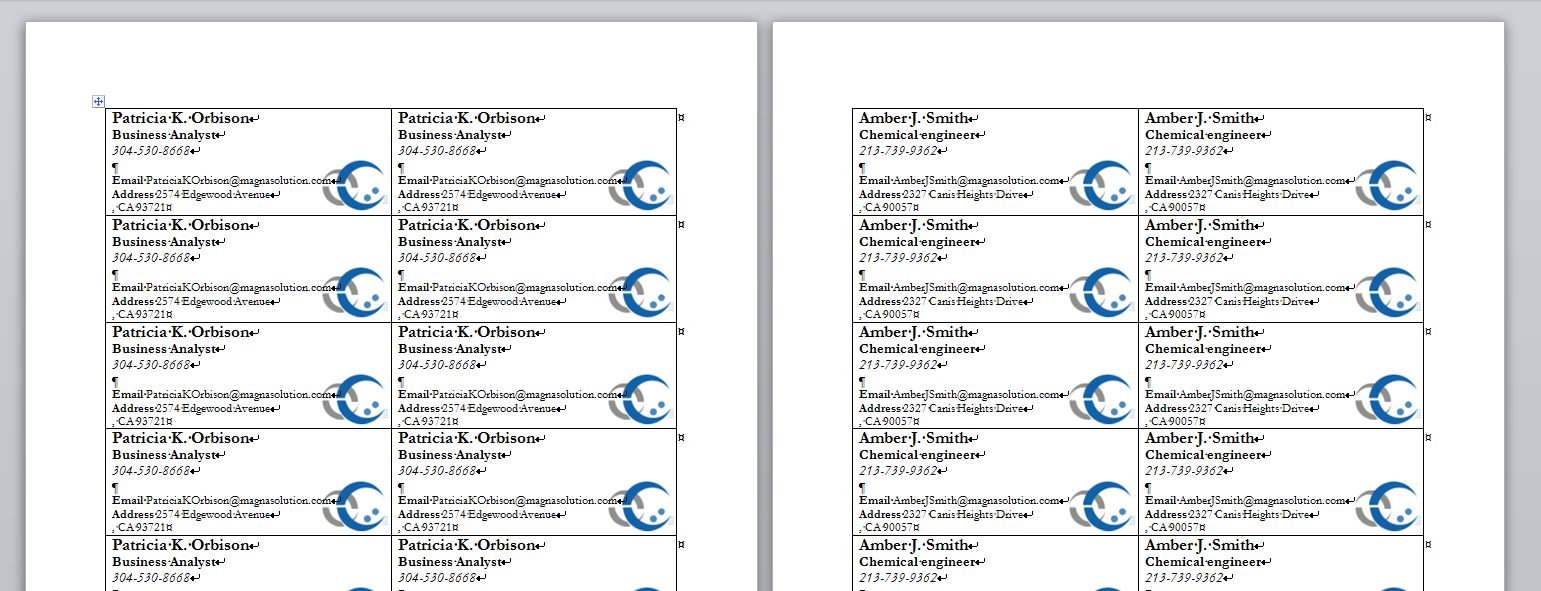
This is the intended SetMailMerge behavior, as the entire document was repeated for each row of data. In the next section we will incorporate next fields so that only one business label is made for each employee.
The NEXT fields change how WordWriter imports multiple rows of data. In regular repeat blocks, an entire portion of the document will be repeated for every row of data, or in the case of SetMailMerge, the entire document will be repeated. With NEXT fields, WordWriter will first look to see if it can populate a merge field that is preceded by a NEXT field before repeating the section.
This will allow us to populate through an entire page of business labels before moving on to a second page.
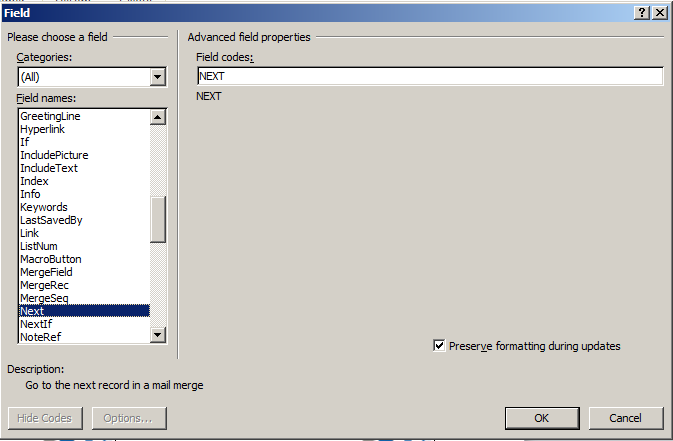
1. Place the cursor in the topmost right table cell. This is where the NEXT field will go.
2. Go to Insert > Quick Parts and select Field from the drop-down. Select Next from the list of available fields. Click OK to add the NEXT field.
3. Repeat this process for each business label on the page, except for the first business label. When you are done, press ALT + F9 to show all the NEXT fields to confirm.
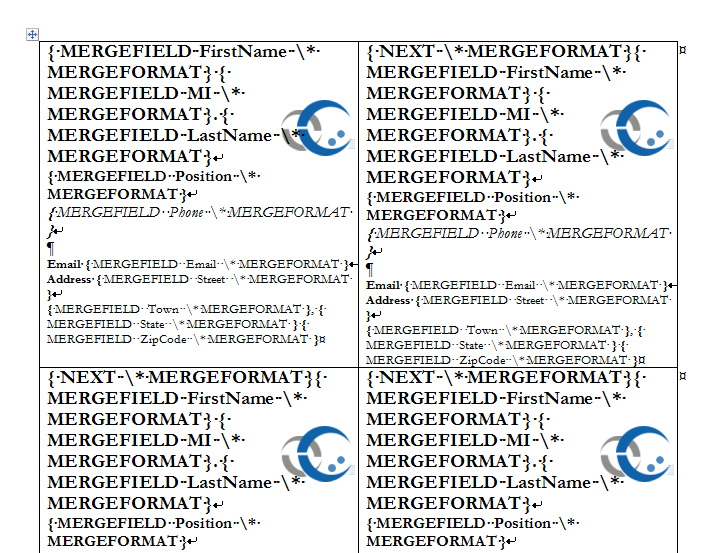
4. Press ALT + F9 to hide the field codes again. The template is now ready for NEXT fields.
By default, NEXT fields will be ignored by WordWriter. To enable NEXT fields, set the WordTemplate.EnableNEXTFields property. This property must be set before WordTemplate.Open is called.
| Code Block |
|---|
WT.EnableNEXTFields = true;
|
| Code Block |
|---|
//Instantiate a new WordTemplate object
WordTemplate WT = new WordTemplate();

//NEXT fields will be ignored by default
//This must be set before Open() is called
WT.EnableNEXTFields = true;

//Open the template file
WT.Open(Page.MapPath("//templates//Business_Label_template.docx"));

//Get the order info datatable using GenericParser
DataTable dtBusinessLabels = GetCSVData("//data//BusinessLabelTutorialData.csv");

//Set the data sources to import a single row of data for each source
WT.SetMailMerge(dtBusinessLabels);

//Process to import the data to the template
WT.Process();

WT.Save(Page.Response, "Business_Labels_Output.docx", false);
|
Run the code. The business labels are now populated throughout the page, only moving to the second page after the first page is filled.
You can download the code for the Basic WordWriter Tutorials as a Visual Studio solution, which includes the Business Labels tutorial.