
.
Table of Contents | ||||
|---|---|---|---|---|
|
| Note |
|---|
This is Part 2 of a 23-part tutorial series for the Project Proposal scenario. It is recommended that you complete Part 1 - Getting Started before starting this section. |
| Info | ||
|---|---|---|
| ||
There is a downloadable SomeFilePowerPointWriter_BasicTutorials.zip with completed templates and code. The completed example of the template is available under ProjectProposal/templates/part2_template.pptx. The code for this part of the tutorial can be found in Part2.aspx.cs. |
This part focuses on taking advantage of PowerPointWriter's repeat slide behavior. It also covers passing between the Template and Application objects and deleting slides if certain conditions are not met.
There are no changes to the code from part 1.
PowerPointWriter offers powerful tools for repeating data across PowerPoint slides. For more information see Fitting Data on to Multiple Slides.
We are going to start with the template file as it was at the end of Part 1.
...
...
...
...
...
...

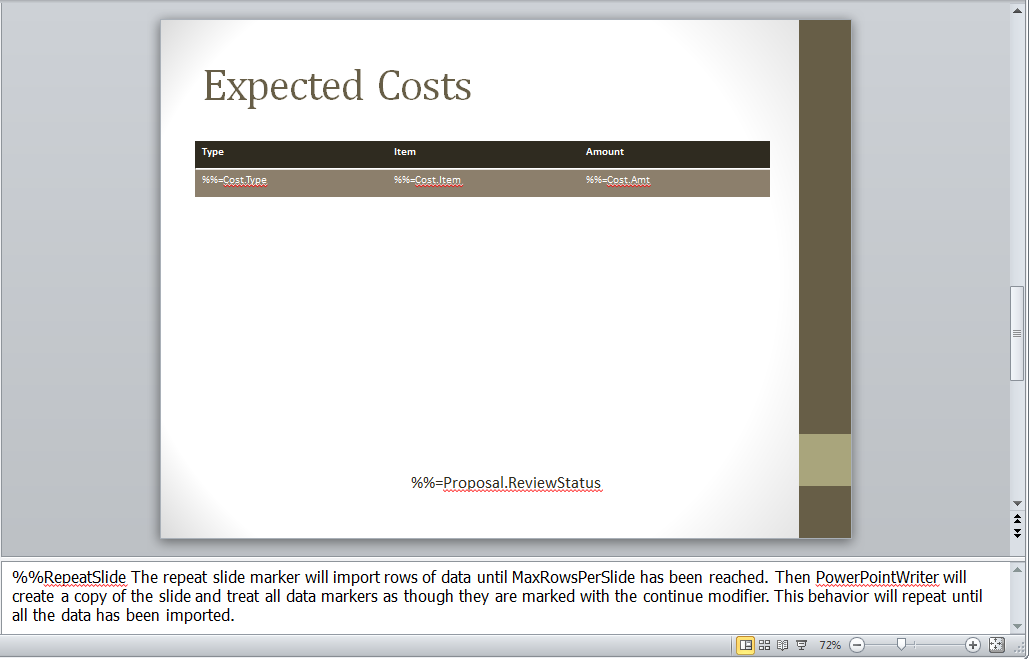
Our next slide will contain a list of estimated costs for the project.
...
...
...
...
...
...
6. To use the RepeatSlide marker, add the text '%%RepeatSlide' as the first string of text in the notes section of the 'Expected Costs' slide. Make sure there is a space between %%RepeatSlide and the next item of text. The completed slide should look like this:
Our template file contains an extra slide is not necessary for the presentation. PowerPointApplication has the ability to delete slides from a presentation. As we have been working in PowerPointTemplate we must pass the Template object to the Application object. This will be done in the code section of this tutorial. See [Passing between Template and Application for more information.
The extra slide in the template file look like the following:
the one below. Note the RepeatSlide marker in the notes section of the slide.
We will reuse the code from Part 1 of this tutorial. We will take out the Process and Save calls and add our new code for Part 2.
...
2. Set the MaxRowsPerSlide property to be 10.
| Code Block |
|---|
dataProps.MaxRowsPerSlieMaxRowsPerSlide = 10; |
3. Bind the Team and Cost data sets to the template
...
| Code Block |
|---|
pptt.Process(); |
56. Pass the Template object to PowerPointApplication so that Application methods can be used.
| Code Block |
|---|
PowerPointApplication ppta = new PowerPointApplication();
Presentation pres = ppta.Open(pptt);
|
7. We want to delete the last slide in our presentation, so we need to know how many slides there are. We can use Slides.Count to get this information.
| Code Block |
|---|
int numSlides = pres.Slides.Count;
|
6. Use the Use the Slides.Delete method to delete the last slide. It takes an integer representing the index of the slide to delete as a parameter.
| Code Block |
|---|
int numSlides = pres.Slides.CountDelete(numSlides - 1); |
7.Save the final presentation and stream it in the response.
| Code Block |
|---|
ppta.Save(pres, Page.Response, "Part2_Output.pptx", false); |
| Note |
|---|
For information on writing this code, see Part 1 - Getting Started. |
| Code Block |
|---|
//Code from Part 1
PowerPointTemplate pptt = new PowerPointTemplate();
pptt.Open(Page.MapPath("//templates//part1_template.pptx"));
DataBindingProperties dataProps = pptt.CreateDataBindingProperties();
object[] valuesArray = { "ProjectSurgery NameSchedule", "Project DateJanuary 1, 2014", "Under Review", "LeaderPamela NameBlythe", "Start DateJanuary 1, 2015", "Cost6 Estimatemonths", "Project SummarySoftware to schedule surgeries that require multiple resources such as surgeons, assistants, nurses, pre-op and post-op space, surgery theater, long-term recovery rooms." };
string[] columnNamesArray = { "Name", "Date", "ReviewStatus", "Leader", "Start", "Estimate", "Summary" };
pptt.BindData(valuesArray, columnNamesArray, "Proposal", dataProps);
//Code from Part 2
DataTable dtTeam = GetCSVData(Page.MapPath("//data//Team.csv"));
DataTable dtCost = GetCSVData(Page.MapPath("//data//Cost.csv"));
dataProps.MaxRowsPerSlide = 10;
pptt.BindData(dtTeam, "Team", dataProps);
pptt.BindData(dtCost, "Cost", dataProps);
pptt.Process();
PowerPointApplication ppta = new PowerPointApplication();
Presentation pres = ppta.Open(pptt);
int numSlides = pres.Slides.Count;
pres.Slides.Delete(numSlides - 1);
ppta.Save(pres, Page.Response, "Part2_Output.pptx", false);
|
You can download the code for the Basic PowerPointWriter Tutorials as a Visual Studio solution, which includes the Project Proposal.
Continue on to Part 3 - Passing to PowerPointApplication