
.
...
| Introducedin | ||
|---|---|---|
|
...
|
Starting in version 7.1
...
of
...
ExcelWriter,
...
you
...
can
...
use
...
...
...
...
...
to
...
display
...
flat
...
data
...
in
...
a
...
grouped
...
and
...
nested
...
format
...
using
...
the
...
ExcelTemplate
...
object.
...
...
...
...
...
...
...
...
...
[
...
...
]
Screenshots from the sample are used below.

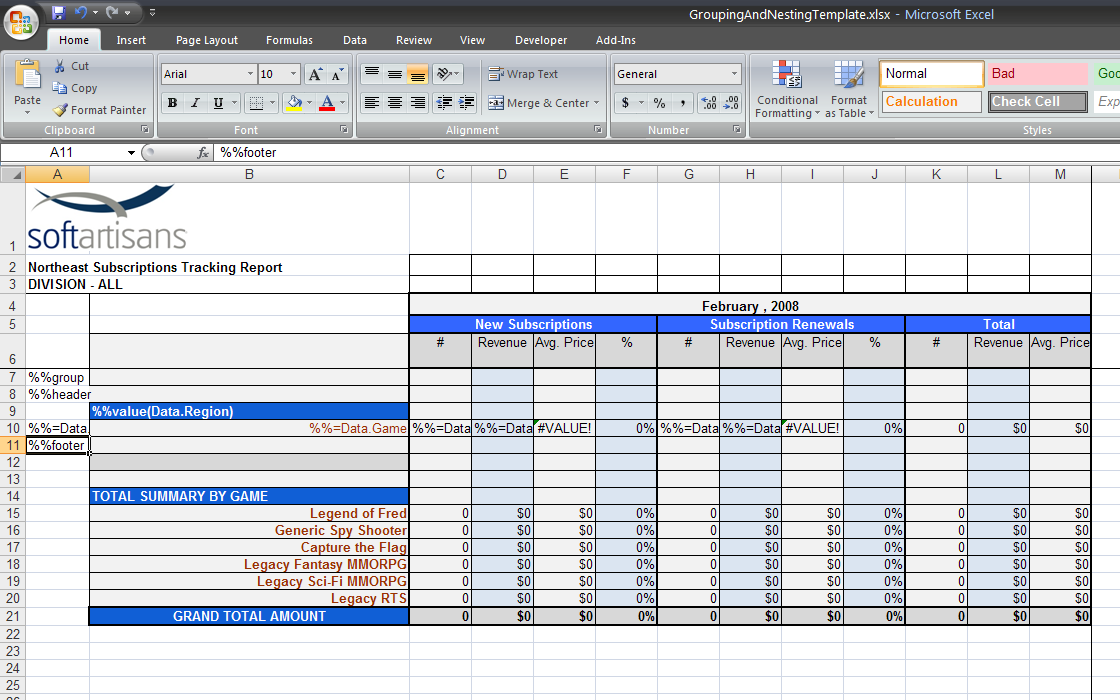
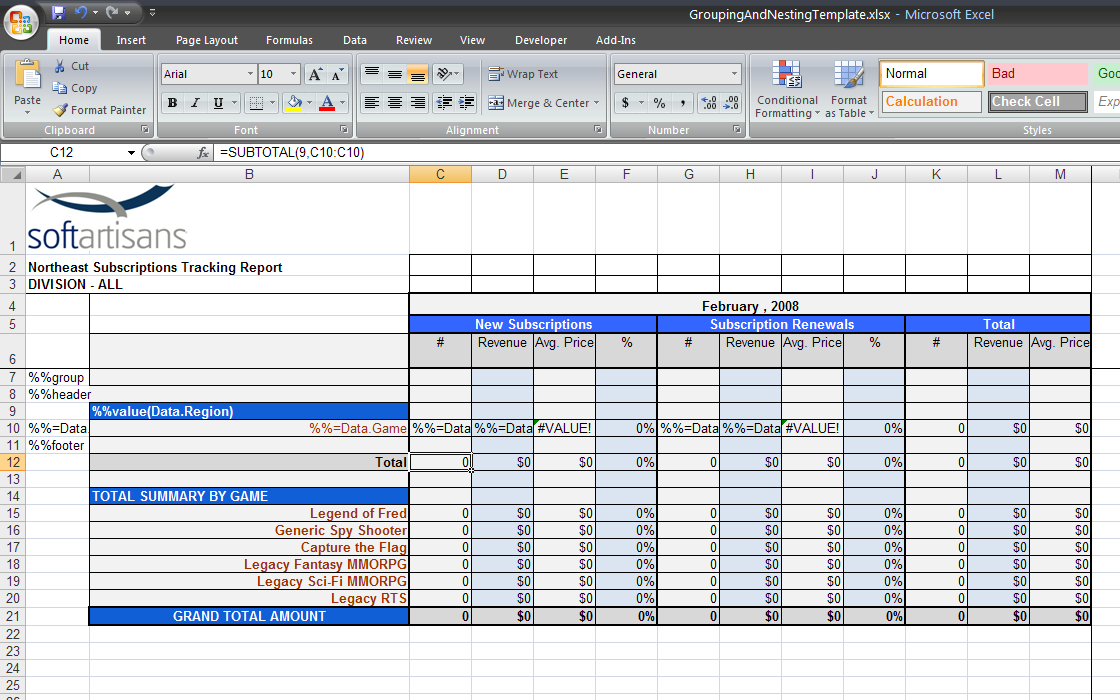

Generally, there are few changes that need to be made to data to use ExcelTemplate's Grouping and Nesting functionality. There are some guidelines, however, that you must follow when setting up your data source:
Bind data to a grouping block just as you would group it to a normal data marker row. Use the ExcelTemplate.BindData() method to bind the data to the spreadsheet. The following code opens a spreadsheet with a grouping block, creates a DataSet from an XML file, binds the DataSet to the template, then processes the file and streams it to the user.
| Code Block |
|---|
private void GenerateReport()
{
//--- Create a new ExcelTemplate object and open a template file
//--- (Office Open XML format -- .xlsx) containing grouping data markers
ExcelTemplate xlt = new ExcelTemplate();
xlt.Open(Server.MapPath("templates/GroupingAndNestingTemplate.xlsx"));
//--- Create a flat data source, sorted based on the grouping categories
DataSet ds = new DataSet();
ds.ReadXml(Server.MapPath("VideoGameData.xml"), XmlReadMode.ReadSchema);
//--- Bind the data to the template file and send the resulting file
//--- to the client. Office Open XML (.xlsx) format must be used.
xlt.BindData(ds, "Data", xlt.CreateDataBindingProperties());
xlt.Process();
xlt.Save(Page.Response, "GroupingAndNesting.xlsx", false);
}
{code}
h2. Output file
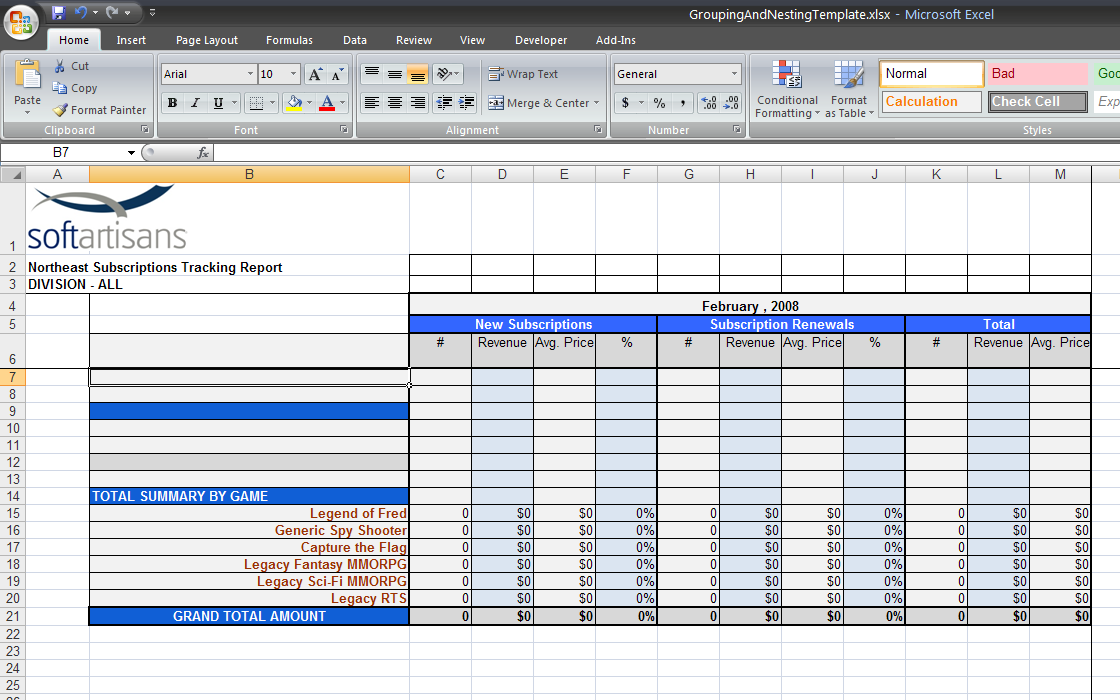
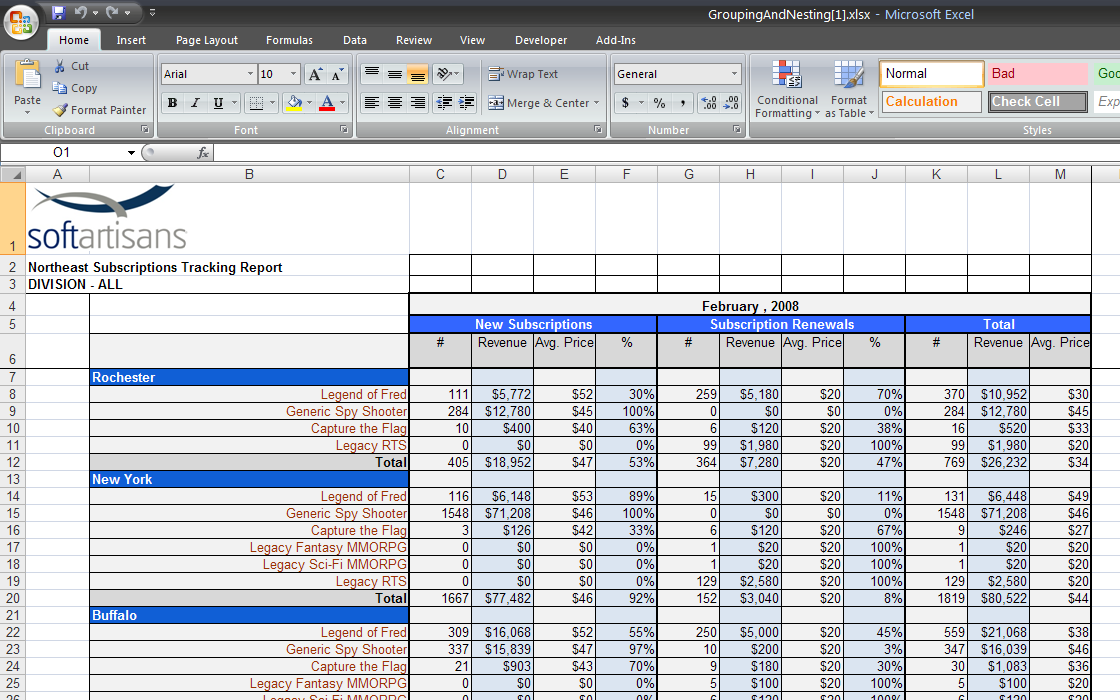
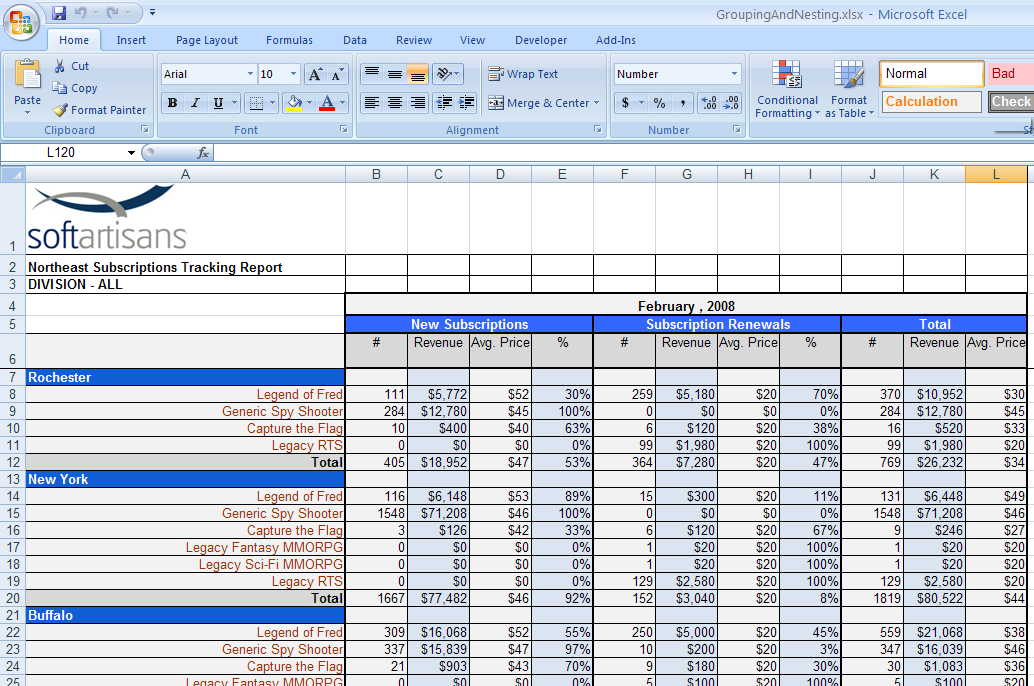
Below are shown the first few groups from the output file. Notice that the group, header, footer, and endgroup marker rows are not shown in the output file, while the hidden Data.Region column data is also removed.
!output1.png!
h2. Formatting Options
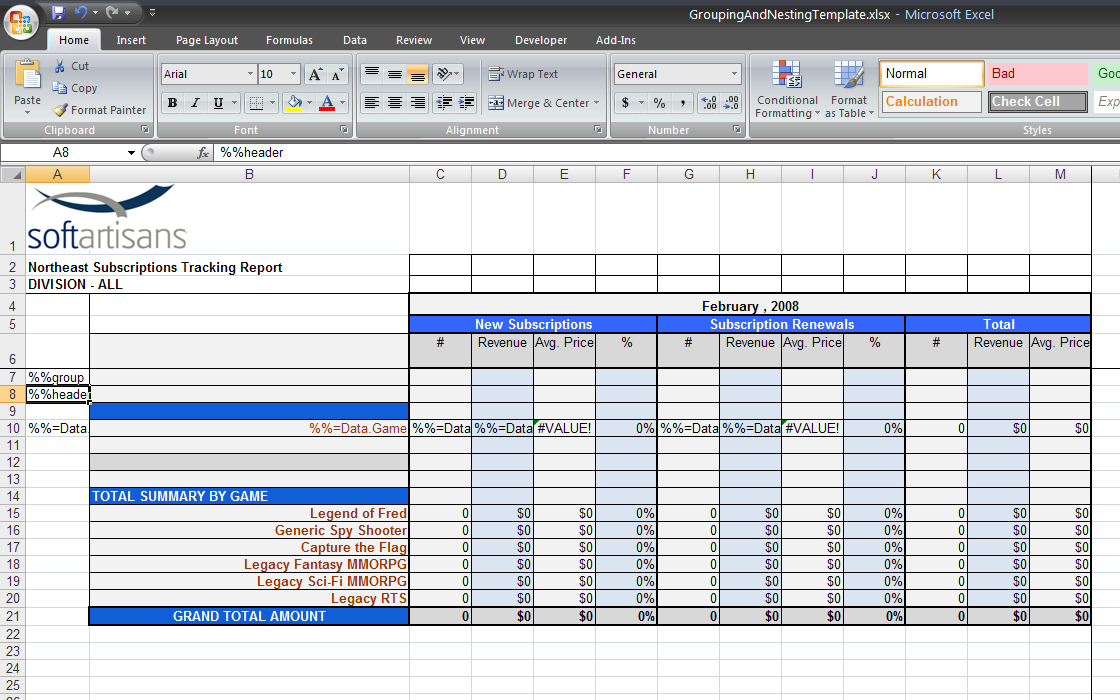
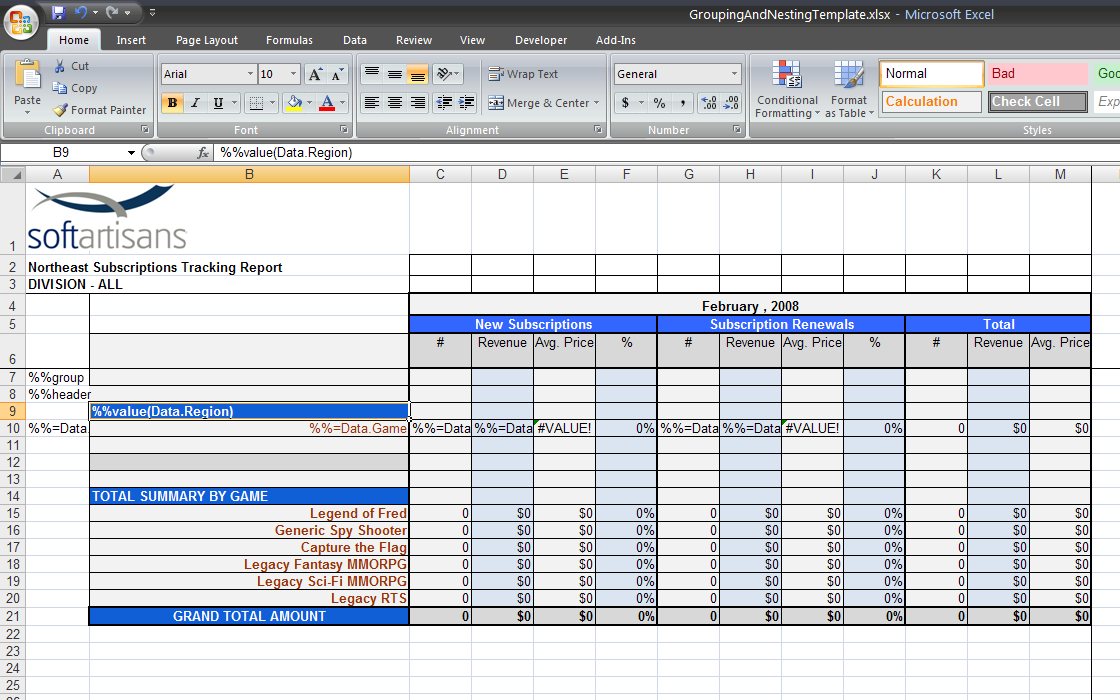
ExcelWriter's Grouping and Nesting formatting is flexible enough to allow for a variety of different layouts. The *%%group*, *%%header*, and *%%footer* markers must be in the same column as the data column you wish to group, but there is no restriction for where that column must be. If you'd like to put the group data directly below the header with the grouping column value, you can simply put the grouping column on the right side of the data:
!endgroup.png!
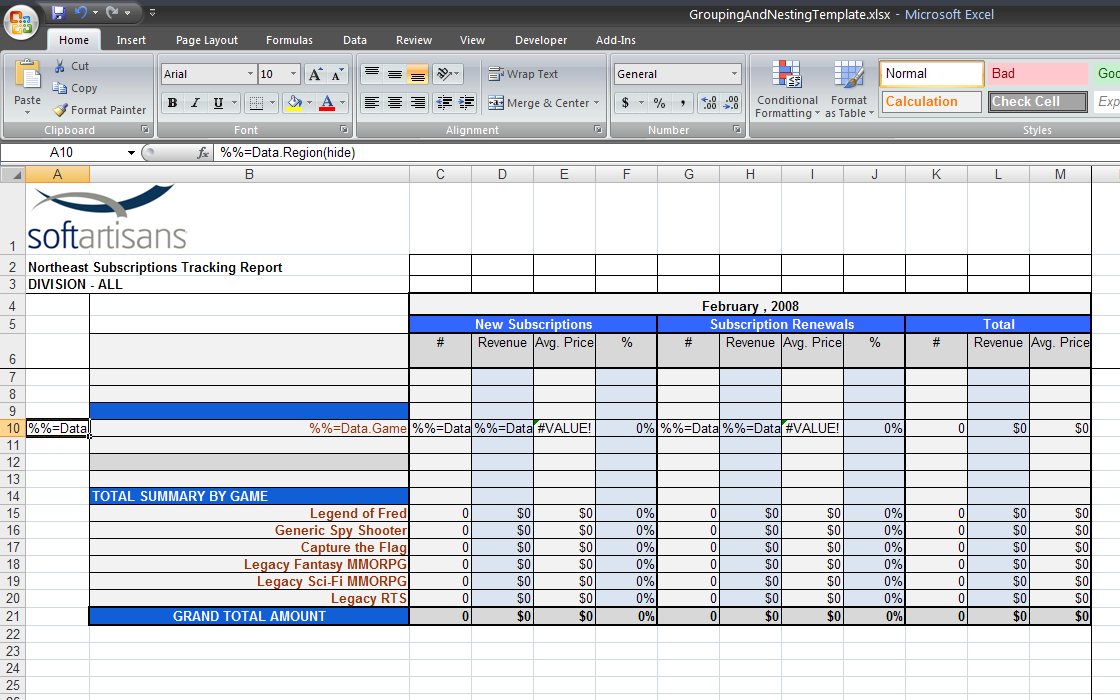
The grouping markers will be removed, and the *(hide)* data marker modifier tells ExcelTemplate to remove the grouping column data as well, so that we do not repeat the values:
!output.png!
{scrollbar} |
Below are shown the first few groups from the output file. Notice that the group, header, footer, and endgroup marker rows are not shown in the output file, while the hidden Data.Region column data is also removed.
ExcelWriter's Grouping and Nesting formatting is flexible enough to allow for a variety of different layouts. The %%group, %%header, and %%footer markers must be in the same column as the data column you wish to group, but there is no restriction for where that column must be. If you'd like to put the group data directly below the header with the grouping column value, you can simply put the grouping column on the right side of the data:
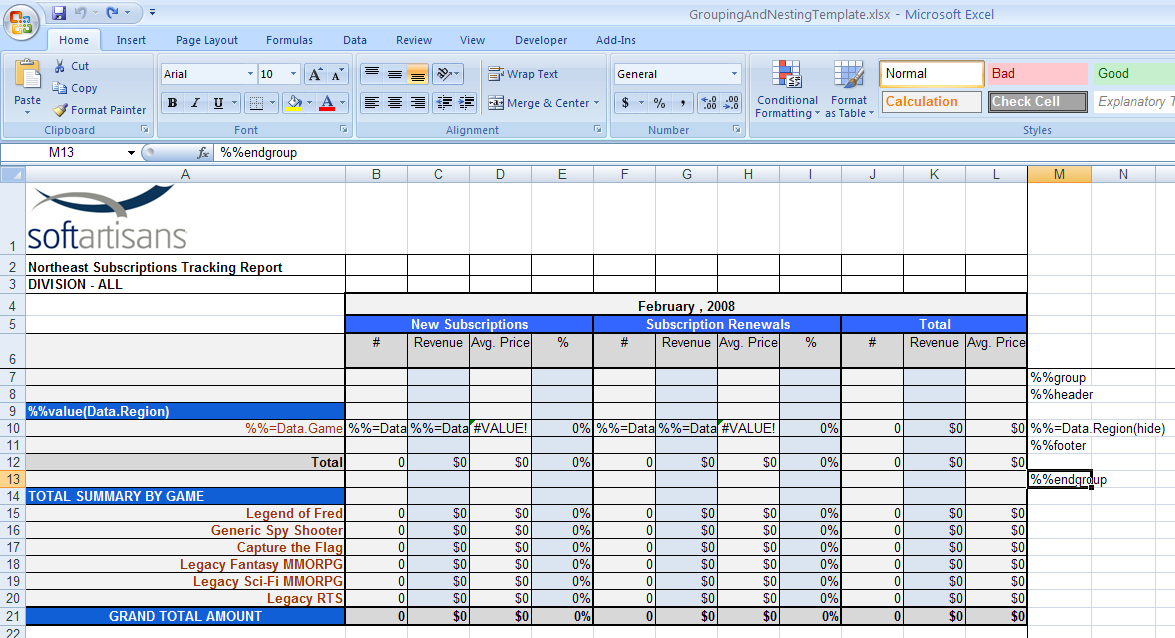
The grouping markers will be removed, and the (hide) data marker modifier tells ExcelTemplate to remove the grouping column data as well, so that we do not repeat the values:
| Scrollbar |
|---|