
.
...
The final template will look something like this: [Screen shot of the final template]
| Info | ||
|---|---|---|
| ||
In the sample code, the completed template file is located in SimpleExpenseSummary/templates/ |
...
In the screen shot, Fiscal Year, Division, and Group will replaced by data markers. Top Expenses, All Expenses, Description, and Expenses are going to become table headers. The data markers for that data will go in the rows below.
[Screen shot]. 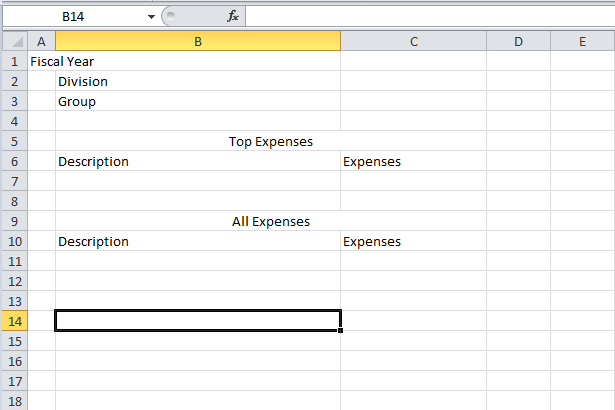
3. Replace Fiscal Year, Division, and Group with data markers. These values are going to be a single row of a data set called "Header". The column names will be "FiscalYear", "Division" and "Group".
...
[Screen shot]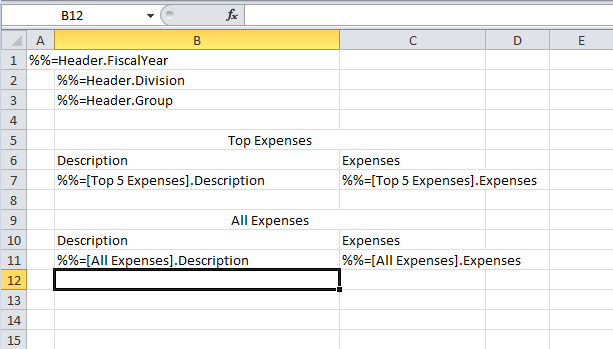
We're done adding the data markers, so next we'll add some styles and formatting to the data markers.
...
5. In the screen shot we have made the %%=Header.FiscalYear cell font size 18, %%=Header.Division is bold, and %%=Header.Group is italic.
[Screen shot ]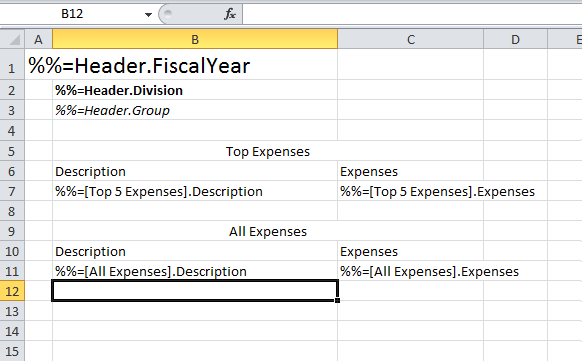
| Info |
|---|
When importing multiple rows of data, ExcelWriter will insert a new row in the worksheet for each row of data, starting from the row with the data markers. Each of the new rows will take on the styles and formatting of the cells that contain the data markers. |
...
6. Since 'Expenses' will be currency values, add a currency number formatting to the cells containing the Expenses data markers. This number formatting will be repeated for row of data that is inserted.
[Screen shot ]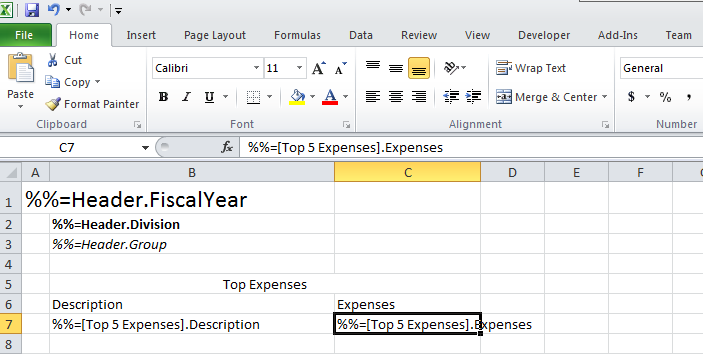
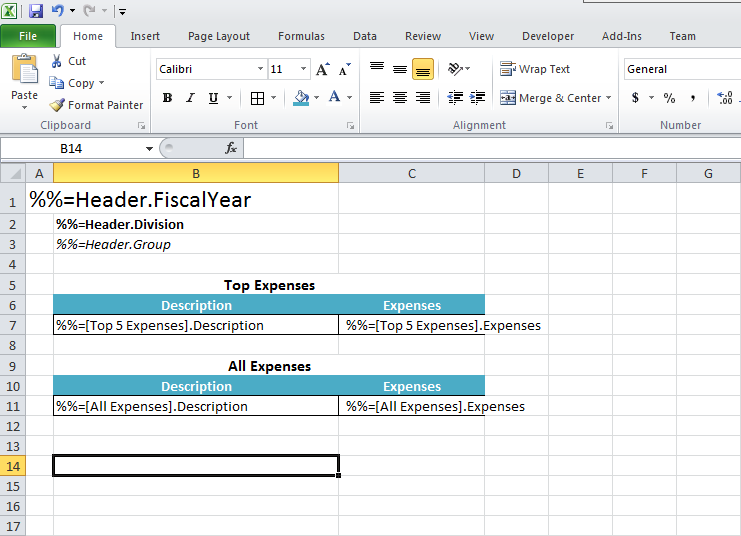
7. Add some borders to the cells in the Top Expenses and All Expenses tables. Then format the table headers as desired. Below is a screen shot of the final image:
[Screen shot ]
We're done creating the template. Now it's time to write the code.
...