
.
Table of Contents | ||||
|---|---|---|---|---|
|
| Info | ||
|---|---|---|
| ||
In the downloadable ADD FILE REFERENCE, there is a completed template file located in ComleteFinancialReport/templates/Part1_Financial_Template.xlsx. |
In this tutorial ExcelTemplate is being used to populate data and ExcelApplication is being used to format the data. This part of the tutorial will make use of data marker modifiers.
| Note |
|---|
This example assumes an understanding of ExcelTemplate. If you are not familiar with how to set up an Excel template with data markers, please go through the Simple Expense Summary first. |
The template should resemble this upon completion: 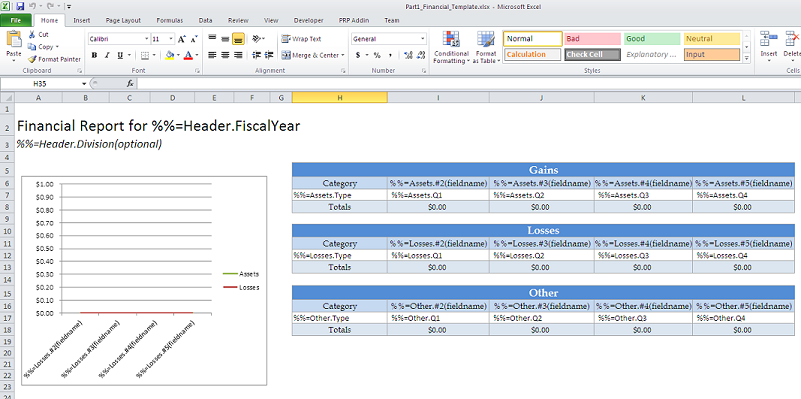
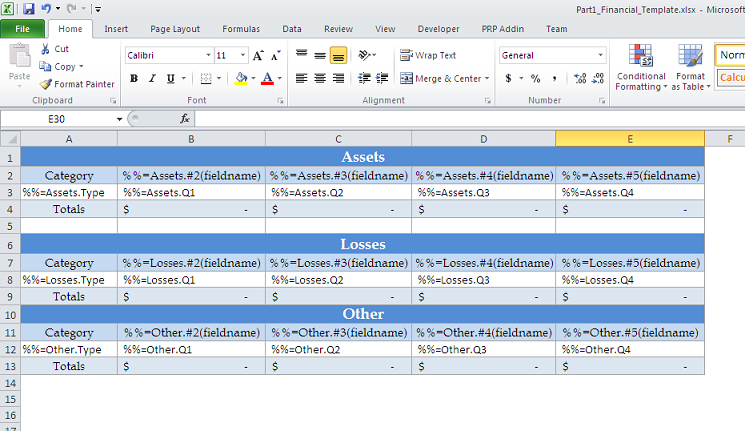
Here is the starting template: 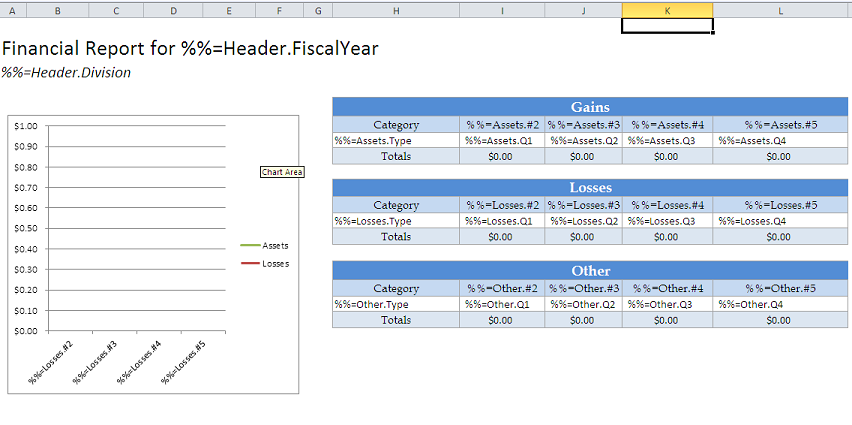
The next few steps will demonstrate adding modifiers.
This template uses two different data marker modifiers - fieldname and optional. Modifiers are added in parentheses at the end of a data marker. They alter the binding behavior of the data marker.
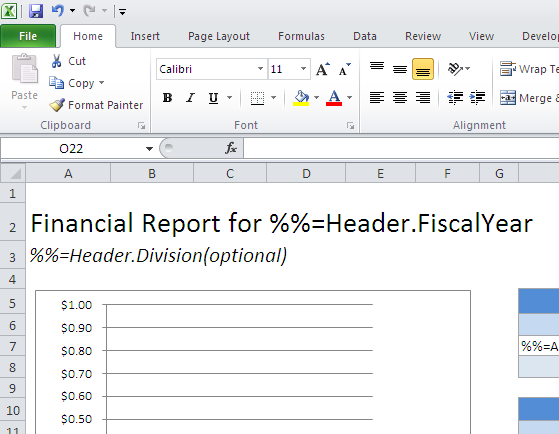
The fieldname modifier shows the fieldname of the column being bound. It will not bind any additional data. It is used like this:
The optional modifier allows that data marker to be ignored on data binding. If you have a column that may be empty, the The optional modifier allows you to bind the data set regardlessdata if the column might be empty. It is used like this:
After the modifiers are added, the template should resemble this:
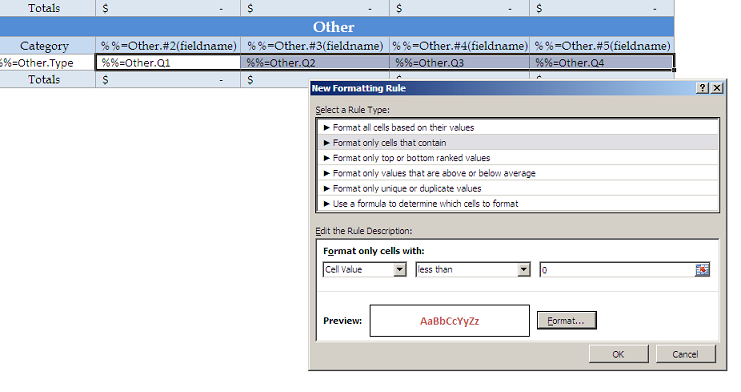
ExcelTemplate will persist conditional formatting in a template. In this tutorial, conditional formatting is applied to the "Other" table. It sets negative numbers to be red and bold.
1. On the "Home" tab in Excel, click on "Conditional Formatting"
2. Select "New Rule..."
3. In this tutorial the condition type is "Format only cells that contain..." The rule is "Cell value less than 0"
4. Click on "Format..." Set the text to be dark red. Set the typeface to be bold.
5. Click OK to save the rule.
...
4. Create a DataBindingProperties object. Although we won't be changing any None of the binding properties , a will be changed for this tutorial, but DataBindingProperties is a required parameter in all ExcelTemplate data binding methods.
...
5. Call ExcelTemplate.Process() to import all data into the file.
| Code Block |
|---|
XLT.Process(); |
We are Do not saving save the file, since we . In the next step the XLT object will be using ExcelApplication to access the file and post-processprocessed by ExcelApplication.
Without the post processing, the populated file will persist the column width and heights. It should look something like this: 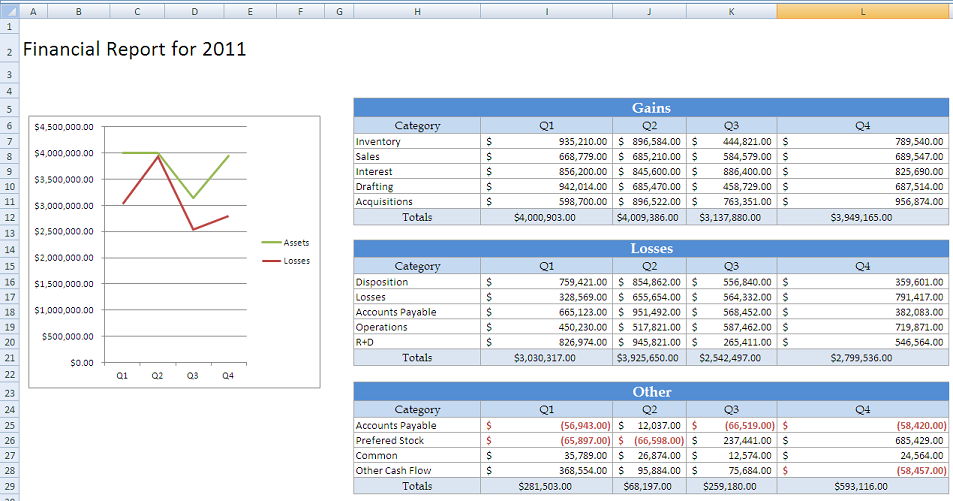
...
2. Open the populated file via the ExcelTemplate objectwith ExcelApplication. The file will open as a Workbook object
...
| Code Block |
|---|
ws.PopulatedCells.AutoFitWidth(); ws.PopulatedCells.AutoFitWidth(); |
5. Finally, call ExcelApplication.Save to save the final file. This example streams the file using the page response.
...
The final output should look something like this: 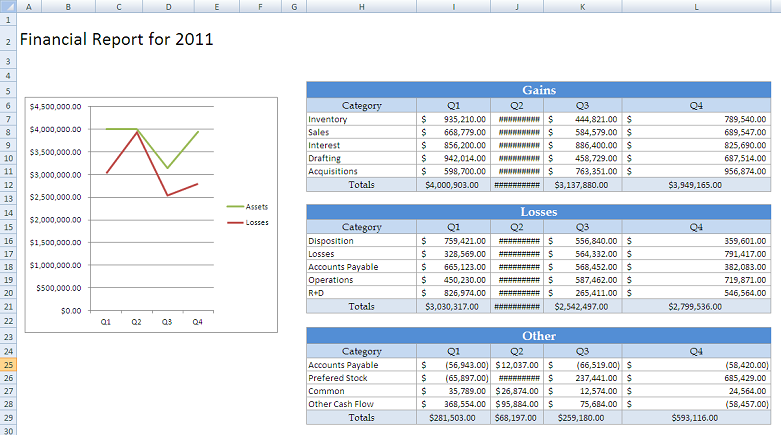
| Code Block |
|---|
ExcelTemplate XLT = new ExcelTemplate();
XLT.Open(Page.MapPath("//templates//Part1_Financial_Template.xlsx"));

DataBindingProperties bindingProps = XLT.CreateDataBindingProperties();

DataTable dtAssets = GetCSVData("//data//Assets.csv");
DataTable dtLosses = GetCSVData("//data//Losses.csv");
DataTable dtOther = GetCSVData("//data//Other.csv");

string[] headerValues = { "2011" };
string[] headerNames = { "FiscalYear" };

XLT.BindData(dtAssets, "Assets", bindingProps);
XLT.BindData(dtLosses, "Losses", bindingProps);
XLT.BindData(dtOther, "Other", bindingProps);


XLT.BindRowData(headerValues, headerNames, "Header", bindingProps);

XLT.Process();

//Post-Processing
ExcelApplication XLA = new ExcelApplication();

Workbook wb = XLA.Open(XLT);

Worksheet ws = wb.Worksheets[0];

ws.PopulatedCells.AutoFitWidth();
ws.PopulatedCells.AutoFitHeight();

XLA.Save(wb, Page.Response, "temp.xlsx", false);
|
...