In Adding a Template to an Existing Report, we see how to add OfficeWriter template information to a saved RDL file. In that case, the database query was defined before OfficeWriter opened the file in Word. This section will explain how to develop a report from start to finish in Word with OfficeWriter and Microsoft Query.
Creating a Data Source
- Open Word and create a new blank document.
- Click Add DataSet on the OfficeWriter Designer toolbar.
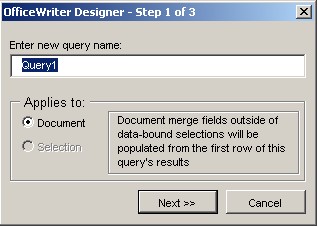
- In the dialog box, type in a name for the query (or leave the default name "Query1"). Click Next.
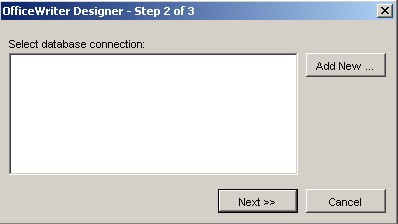
- Click Add New to add a new database connection.
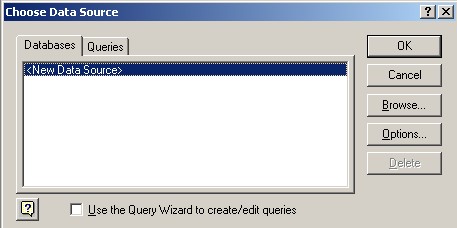
- Select New Data Source and click Ok.
- Enter a data source name and select SQL Server from the drop-down list of database drivers. Click Connect.
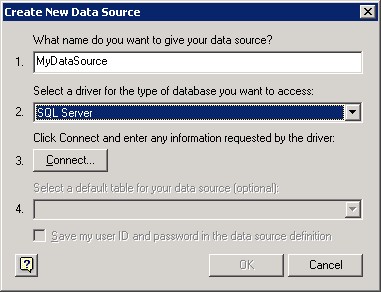
- From the drop-down list of server names, select the server where the AdventureWorks database is installed. Click Options and select AdventureWorks as the default database. Click Ok.
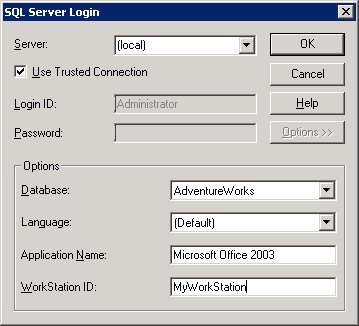
- You should now be back at the Create New Data Source screen. Click
Ok.
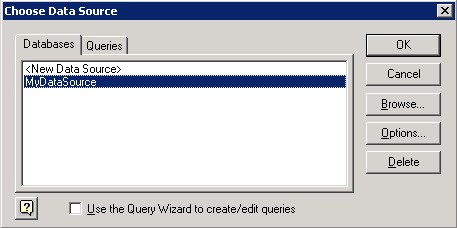
- You will see your new data source in the Choose Data Sourcedialog. Select it and click Ok to open Microsoft Query.
Building a Query
Next, we will build a query that will get the data for our report from the database. OfficeWriter Designer uses Microsoft Query to create queries. When we finished creating our sample Data Source above, Microsoft Query opened.
- In the Add Tables dialog box, find the Employee table in the list and select Add. Then, find the Contact table and select Add.
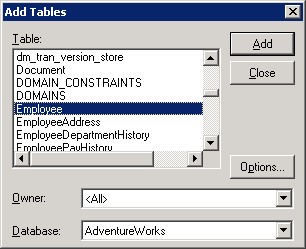
- Click Close. The Employee and Contact tables should now be in MS Query.
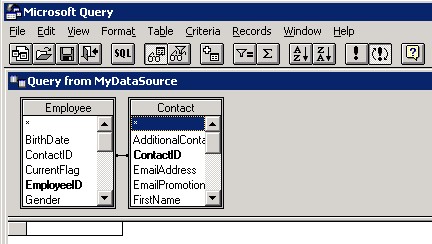
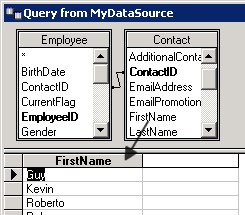
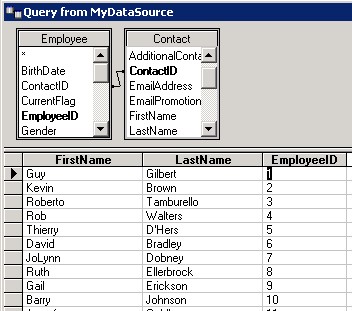
- Add the FirstName and LastName fields to your query by dragging them from the Contact table box to the space below, as shown. Do the same with EmployeeID from the Employee table.
Your query should now look like this:
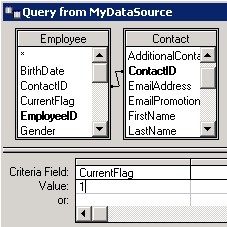
- We will add a filter so that only current employees are returned from our query. Click Show/Hide Criteria on the Microsoft Query toolbar.

- Pull down the Criteria Field list and select Employee.CurrentFlag as shown. Enter the value 1.
- From Microsoft Query's File menu, select Return to OfficeWriter Designer.
Adding Merge Fields
A merge field is a placeholder for database values. When the report is published, OfficeWriter will replace the merge fields with data from the database.
- Place your cursor at the top left of your document.
- Click Merge Fields on the OfficeWriter toolbar and make sure that the query you just created is selected from the list of DataSets.
- Under Insert Merge Field on the OfficeWriter toolbar, select EmployeeID to insert the field in the document.

- Press the Tab key to add a space after the field you inserted.
- Repeat the above steps to insert a field for Lastname.
- Type a comma and a space after the Lastname merge field.
- Repeat the steps to insert a merge field for Firstname.
- Press Enter. Your report should look like this:

- Highlight the line in your document that contains the merge fields, and a blank line below the line of merge fields.

- Go to Merge Fields > your data set > Set Selection to Repeat Region to set the highlighted area to be a repeat region.
Saving and Publishing
Do not use Word's File/Save menu item to save your template. Use the Save button on the OfficeWriter toolbar to save your template as a report definition file in the RDL format.
- From the OfficeWriter Designer toolbar select Save > Save to Disk.
- Navigate to a local folder where you will store the template report file. This will be where you store your work file in case you want to edit it later, not a location on the Reporting Services server.
- Save the template as an RDL file.
Next, deploy and view your report. Your results should look like this:

Samples
Download the .rdl file created in this section.


