
.
Table of Contents |
|---|
The ExcelTemplate object is used for template-driven document generation. This object opens an ExcelWriter template file, populates it with data from a specified data source, and generates a new Excel workbook. An Excel file uploaded as an ExcelTemplate object is not directly modifiable at runtime.
The ExcelApplication object is an Excel file engine that can be used to create, open, modify, and save workbooks. A single instance of ExcelApplication can generate multiple Excel workbooks.
This tutorial opens an Excel template file formatted as for ExcelTemplate (i.e. it contains data markers) and makes customizations using ExcelApplication object, based on a user's selections. In particular, it highlights the functionality of the CopySheet method. Then data is bound to the template using ExcelTemplate, again, based on a user's selections.
The template file should look something like this:
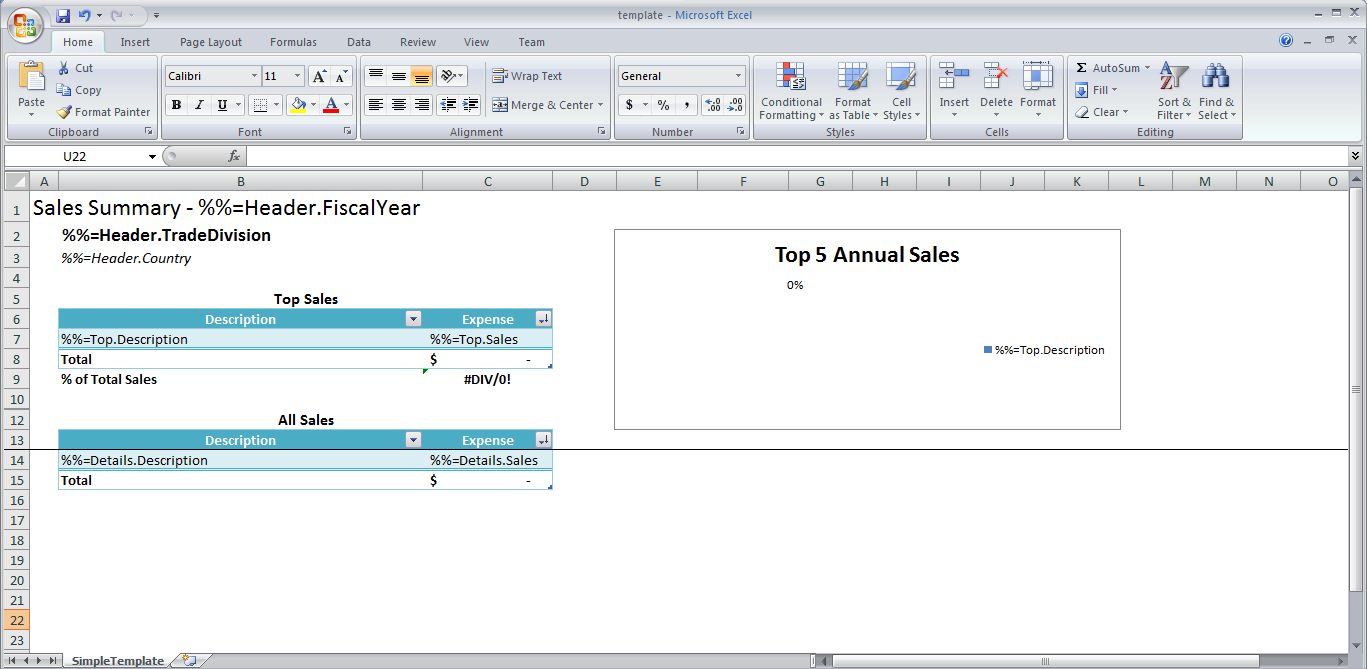
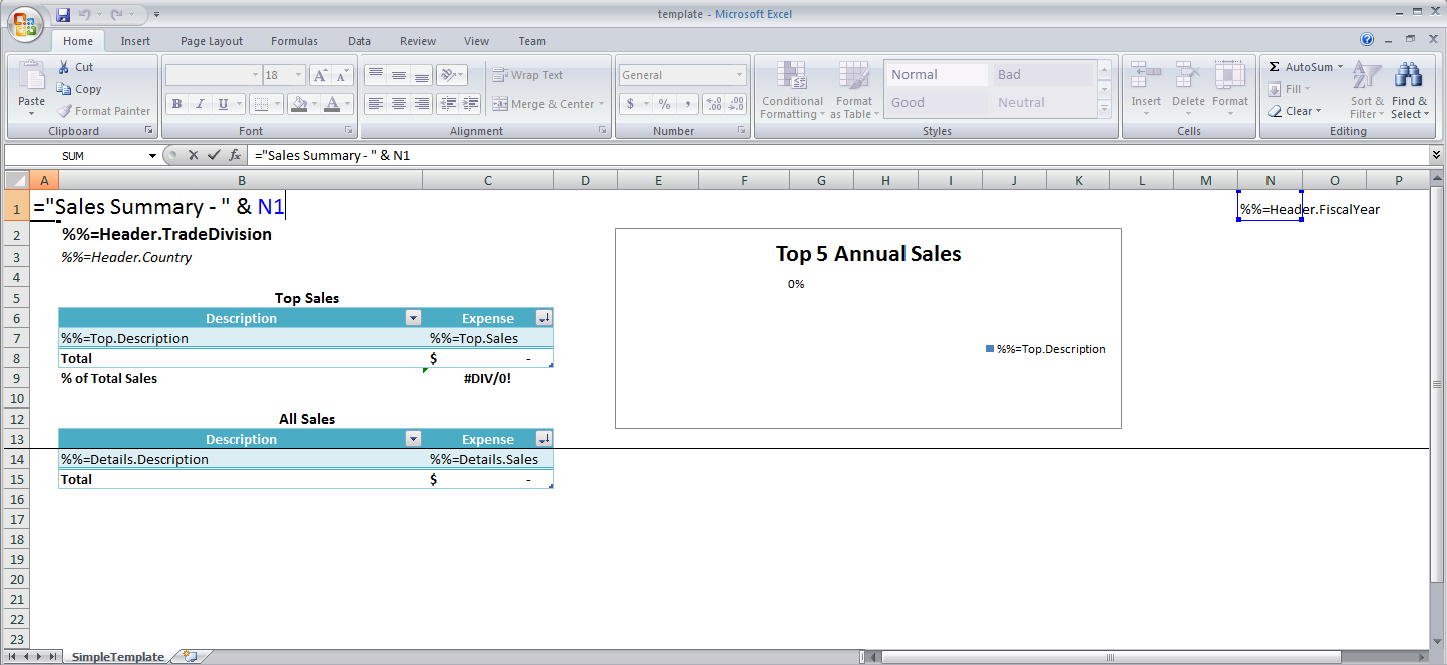
In the template, the %%=Header.FiscalYear data marker is concatenated with "Sales Summary -". Data markers cannot be used directly in formulas; the data marker needs to be in a separate cell, which can be referenced in an Excel formula.
In the header, there is a formula =CONCATENATE("Sales Summary - ", N1), where N1 is the cell that actually contains the %%=Header.FiscalYear data marker. This is shown in the image below.
To create a .NET project and add a reference to the ExcelWriter library:
SoftArtisans.OfficeWriter.ExcelWriter.dll is located under Program Files > SoftArtisans > OfficeWriter > dotnet > binThere are two main sections of code that will be covered:
ExcelApplication code to customize the template based on a list of countries that a user has selectedGenerateTemplate() methodExcelTemplate code to bind data to the customized templatePopulateTemplate() method1. Include the SoftArtisans.OfficeWriter.ExcelWriter namespace in the code behind:
2. At the top of the class definition, define global variations for the ExcelApplication, ExcelTemplate, and Workbook objects:
1. Define a method to contain the ExcelApplication code for customizing the sheet. In the sample, this method is called GenerateTemplate()
2. In the helper method, instantiate the ExcelApplication object.
3. Open the Workbook template file with ExcelApplication.Open method.
4. In the sample, the user selects anywhere from 1-4 countries to include in the report. The selected countries are stored in the List<string> object, selectedCountries. For each country, make a copy of the basic template sheet with Worksheets.CopySheet(), place the copied worksheet at the end of the workbook, and give the new sheet a name.
In this example, the sheet that needs to be copied is the first worksheet in the template file. It can be accessed through Workbook.Worksheets by index (0) or by name ("SimpleTemplate").
6. At this point the workbook contains a worksheet named after each selected country in addition to the original worksheet. Hide the original template sheet by setting Worksheet.Visibility.
7. Select the first visible worksheet to be displayed when the file first is opened using Worksheets.Select().
8. The final code for the GenerateTemplate() method should look like this:
1. Define a method to contain the ExcelTemplate code for binding the data to the template. In the sample, this method is called PopulateTemplate()
2. In the helper method, instantiate a new ExcelTemplate object.
3. Pass the existing ExcelApplication and Workbook to the ExcelTemplate object using ExcelTemplate.Open(ExcelApplication, Workbook).
4. Although not necessary, it may be useful to set ExcelTemplate.RemoveExtraDataMarkers to true. This will tell ExcelWriter to ignore any data markers that are not bound to data sets. This is helpful if you are adding the data binding calls to the code one at a time.
5. For each selected country, data needs to be bound to the corresponding worksheet. Define a DataBindingProperties object for future use and set up a for loop to go through all the selected countries.
The next few steps relate to code contained in the for loop.
For each selected country:
6. Retrieve the name of the country.
7. Instantiate a new DataBindingProperties object.
8. When a data set is bound to an Excel template, any data markers with matching syntax will be populated with the data from that data set. This can be problematic if your template contains copied sheets, where all the data markers are identical.
To get around this, set the DataBindingProperties.WorksheetName to bind a data set only to a particular worksheet.
9. Create an string array for the header values and a string array for the column names.
ExcelTemplate can be bound to numerous types of .NET data structures: single variables, arrays (1-D, jagged, multi-dimensional), DataSet, DataTable, IDataReader etc. The source of the data can come from anywhere.
Some of the aforementioned structures have built in column names, such as the DataTable. When working with arrays, which don't have built in column names, you have to define the column names in a separate string array.
10. Use the ExcelTemplate.BindRowData method to bind the header data to the data markers in the template file (i.e. %%=Header.FiscalYear).
BindRowData() binds a single row of data to the template, but the data markers in the template do not need to be in a single row.
11. Get the data for the Top and Details Sales data sets.
These calls are to a helper method GetCSVData that parses the CSV files and returns a DataTable with the values.
If you are following in your own project and would like to parse the CSV files as well, you will need to:
GenericParsing.dllGeneringParsing at the top of your code.GetCSVData method that can be found in the sample code.12. Use ExcelTemplate.BindData to bind the data for the Top and Details Sales data sets.
Recall that the data source names (Top, Details) need to match the data marker names exactly.
13. The final for loop should look like this:
14. Call ExcelTemplate.Process() to import all data into the file.
15. Call ExcelTemplate.Save to save the output file.
ExcelTemplate has several output options: save to disk, save to a stream, stream the output file in a page's Response inline or as an attachment.
16. The final code for PopulateTemplate() should look like this:
17. Now you may run your code. Just call GenerateTemplate() and PopulateTemplate() to customize and populate your template.
Here is an example of what the sample will look like:
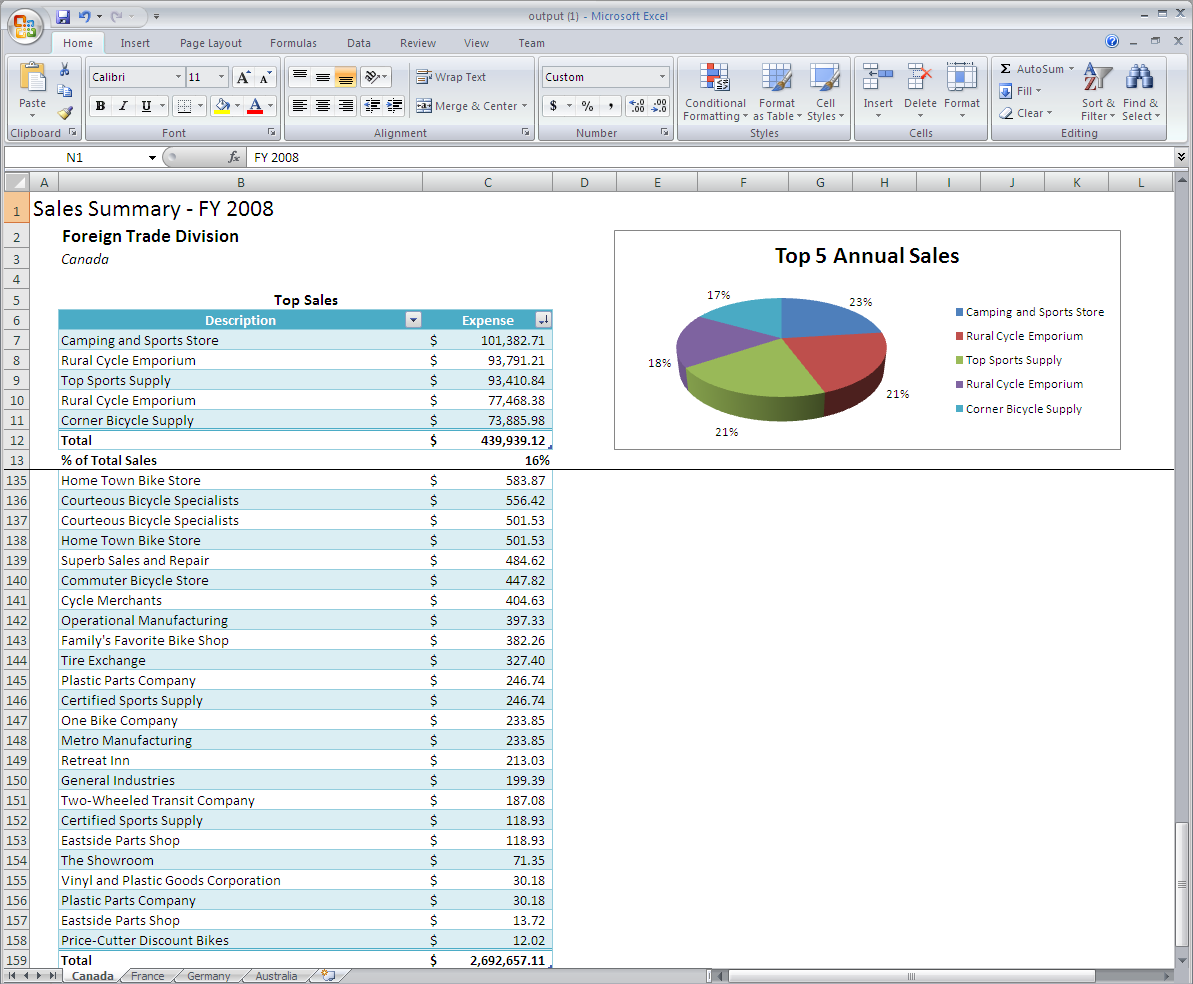
Note that there are multiple worksheets, each with the tab name and data for that region.
You can download the code for the Extended Sales Summary here.

