A report definition file (an RDL file) includes a set of layout instructions and a database query that gets report data when the file is executed by Reporting Services. RDL files are xml-based and are saved with the extension .rdl.
You can open a saved RDL file in Word and add OfficeWriter template information to it.
Opening a Saved RDL File
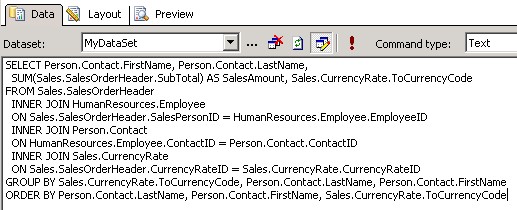
This section assumes that the RDL file being opened was created in Visual Studio and contains the following query:

To open the RDL:
- Open Word.
- From the OfficeWriter Designer toolbar, select Open Report
- Navigate to the .rdl report file created in Visual Studio and open it.
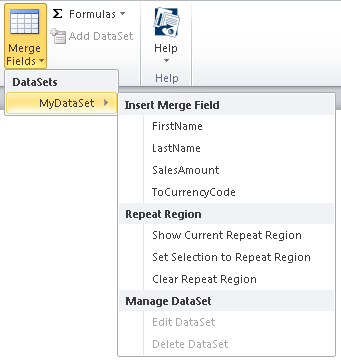
If you go to Merge Fields, you will now see that the dataset is available in the DataSets drop-down and the fields from the query are available for use in the Designer. The fields can be added to the Word report as merge fields (data placeholders).

Designing the Template
The next step is to design the report with the OfficeWriter Designer toolbar and regular Word functionality. We have several articles for how to develop reports with the OfficeWriter Designer in Word:
- Adding Merge Fields
- Formatting Merge Fields
- Importing Data into a Report
- Adding Formulas
- Reports with Parameters
Saving the Template Information to the RDL
When you save the file, the OfficeWriter template information will be added to the RDL file. To save the template information to the RDL:
- Go to Save > Save to Disk
- There will be three format options that represents the Word file formats: Office 2003 (DOC), Office 2007 (DOCX), Office 2007 with macros (DOCM). These determine what file format is used to render the report from Reporting Services.
See Saving and Deploying your Report for more information.
Deploying and Viewing the Report
- To deploy a report from the OfficeWriter Designer select Save > Deploy to Remote Server.
- From the Publish dialog box select the drop-down to display the Server or URL.
- Choose the server on which Reporting Services is installed.
- Click Refresh.
- Select a folder for which you have publish rights and click Ok.
- If your report published with no errors, you will receive a Publish Successful message dialog. Click Ok to continue.
Once the report has been deployed to the report server, you can view the report from within the OfficeWriter Designer by clicking View or going to Report Manager and exporting the report in the OfficeWriter for Word rendering option.

