.
Starting in version 7.1 of ExcelWriter, you can use grouping and nesting markers to display flat data in a grouped and nested format using the ExcelTemplate object.
The previous tutorial, Using Grouping and Nesting with ExcelTemplate, showed how to use the new %%group marker to group hierarchical data from a flat data set. In this tutorial, we expand upon the concept by introducing advanced features: headers and footers for each group, the %%value() marker to show data values in headers and footers, the (hide) modifier to hide data that is already shown in a header or footer, and formatting options.
This tutorial uses the same code and data as the previous tutorial, Using Grouping and Nesting with ExcelTemplate. The template used in this tutorial starts where the previous tutorial left off.
Headers in ExcelWriter grouping and nesting are repeated for every new value in a grouped column. The beginning of a header block is indicated by a %%header marker, while the end of the block is marked by the next %%header block (if you have nested headers) or the data marker row.
The following template has a simple row of blue cells as the header for the Territory Name group:
\
\
When it is processed using the ExcelTemplate object, a row of blue cells is added above each new Territory Name block:
\

\
While the above example helps to separate the different regions from each other in nested output, you can also add content to the headers. Any text that you place within header rows will be repeated as well for each header.
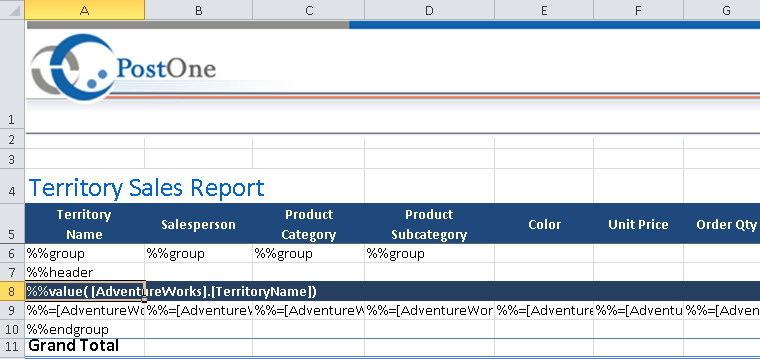
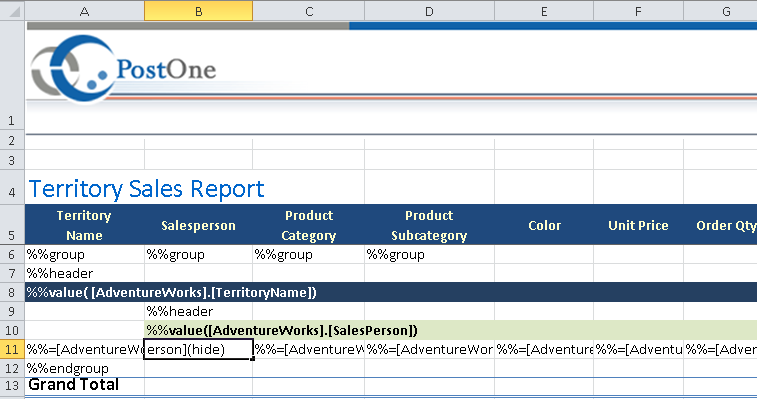
Static text within the header will be repeated unchanged for every header. You can dynamically add in data from the data rows using the %%value data marker. In the example below, we place each Territory Name in the header for each Territory Name by placing %%value([AdventureWorks].[TerritoryName]) in the header. The text within the %%value() marker is the data marker you'd like to display, without the "%%=":
\
\
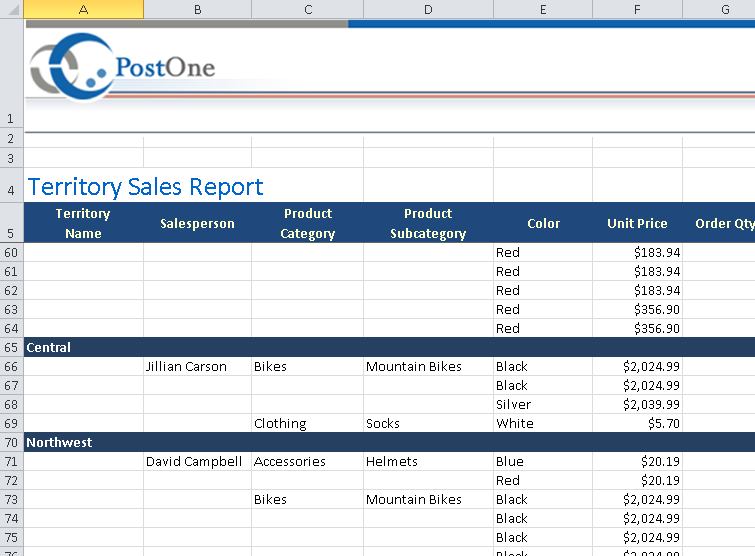
Each header will now feature the Territory Name of its group:
\
\
In the example above, we were able to place the Territory Name values in the header using the %%value marker. However, the Territory Name values are repeated still in the data rows. You can hide the repeated values in the data marker row by appending the (hide) data marker modifier to the end of the %%=[AdventureWorks].[TerritoryName] data marker in the data marker row:
\

\
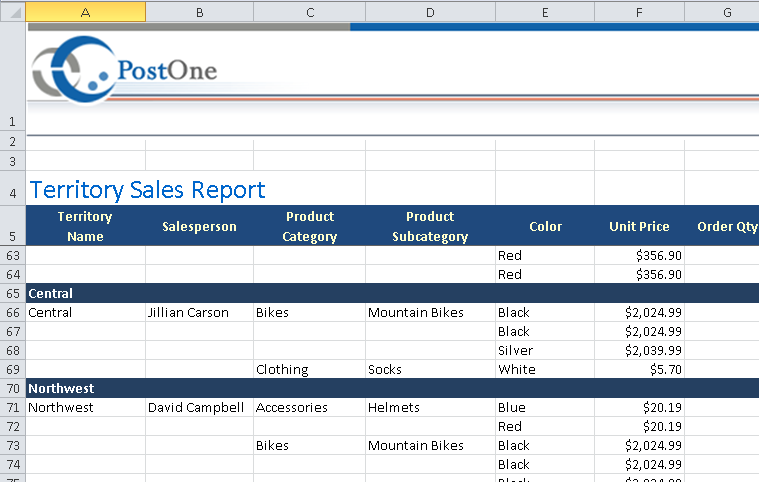
When the data is bound to the template, the Territory Name field is omitted from the data rows, while it is preserved in the headers:
\
\
In the examples above, we define a header for the top field in the hierarchy directly above the data marker rows. You can further organize your data using headers for nested fields. To do so, add a %%header marker to the field's column in the row directly below the header that precedes it. In the example below, we add a header to the Salesperson field. The header has a green background and includes the value of the field. We've also removed that value from the data rows using the (hide) data marker modifier:
\
\
When the template is filled, the Salesperson headers are repeated for every Salesperson within their corresponding Territory groups:
\
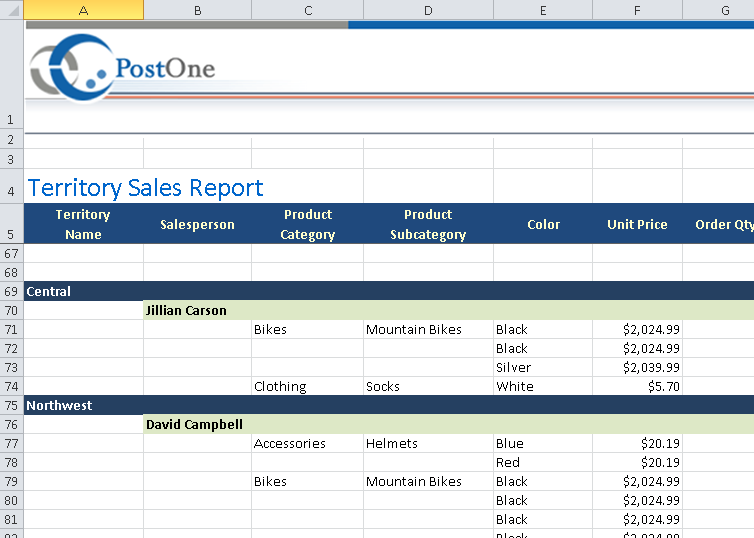
\
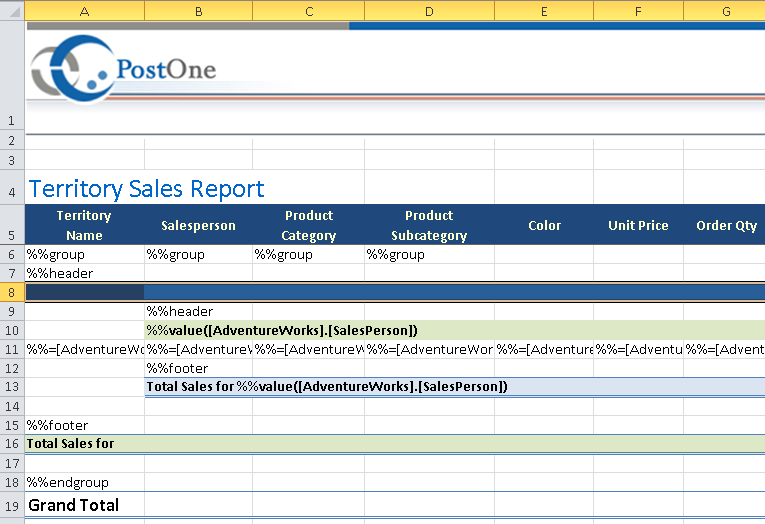
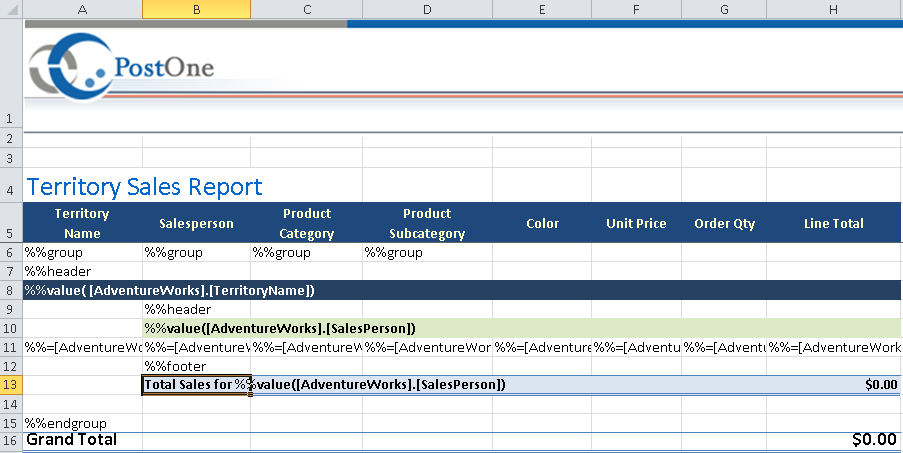
The %%footer marker allows you to add a footer for your groups. The first footer should be placed directly below the data row and will end with either the next %%footer marker or the %%endgroup marker. Everything in the footer will be repeated below the data for each value in the given field. In the example below, we've added a footer to the Salesperson field. It contains two rows: a blank row and a row in color blue using the formula ="Total Sales For " & B10 in cell B13 and the formula =SUBTOTAL(9, H11:H11) in cell H13.
\
\
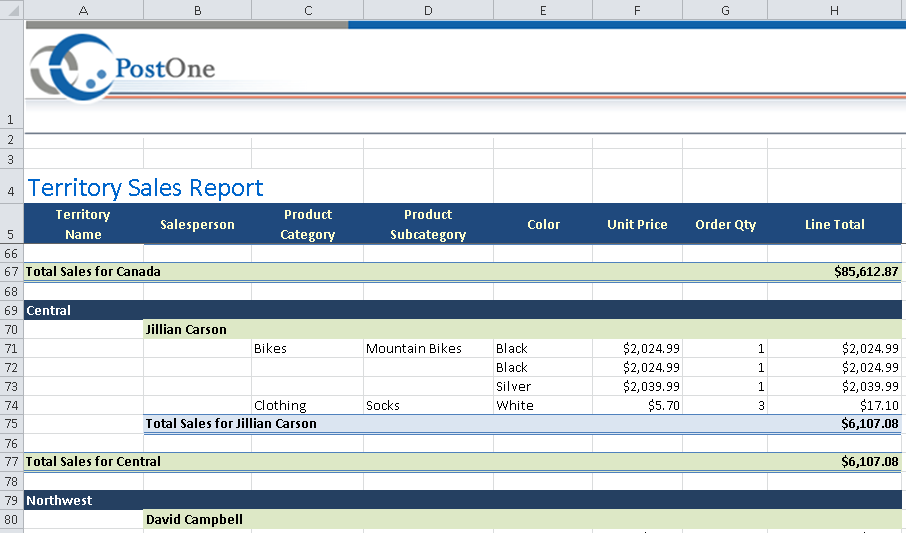
The formula in cell B13 will evaluate to say "Total Sales For [Salesperson]" for each salesperson. The formula in cell H13 will subtotal the sums of each Line Total for each salesperson:
\
\
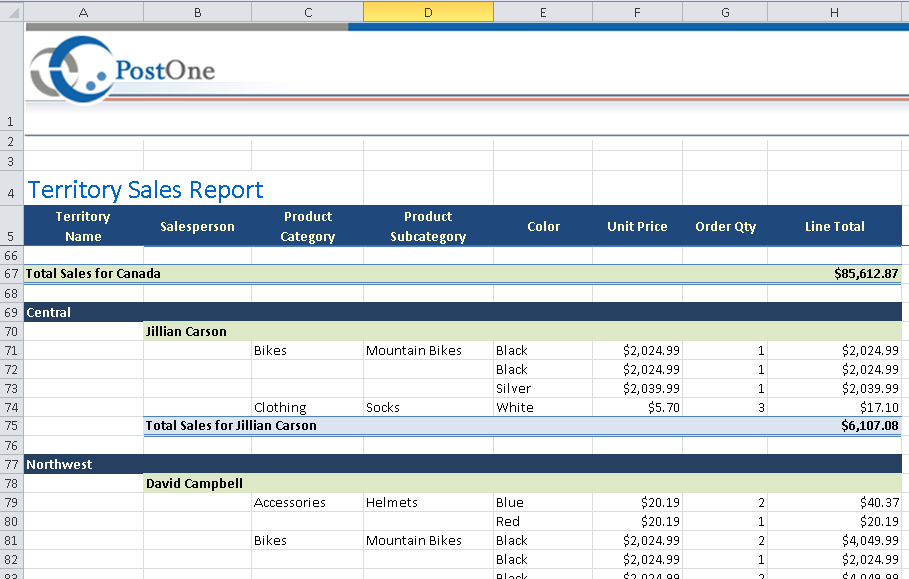
Just as with headers, footers can be nested within each other. If you place a %%footer marker for another column, the results will be nested within each other just as they were with the headers. In this case, we will add a footer for the Territory Name column directly below the Salesperson footer. This time, cell A16 will have the formula ="Total Sales for " & A8 and cell H16 will have formula =SUBTOTAL(9, H11:H11) :
\
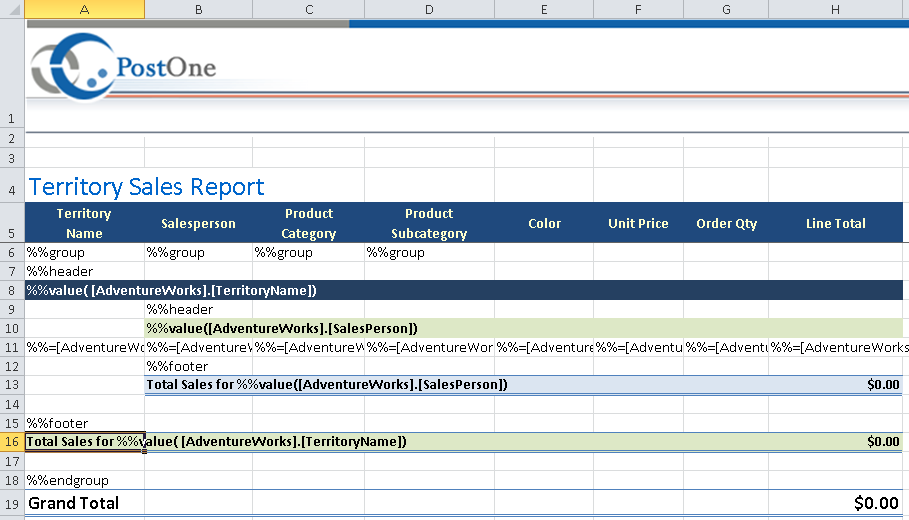
\
Column A of the footer will evaluate to say "Total Sales for [Territory Name]", while column H of the footer will subtotal the values of each Line Total for each Territory Name. Because we used the SUBTOTAL formula instead of the SUM formula, the subtotals of our Salesperson footer will not be included in the sum: