A report definition file (an RDL file) includes a set of layout instructions and a database query that gets report data when the file is executed by Reporting Services. RDL files are xml-based and are saved with the extension .rdl. After creating a report template with OfficeWriter, you save it as an RDL file and publish it on the Reporting Services server.
You can open a saved RDL file in Excel and add OfficeWriter template information to it. If the saved report defintion was not created using OfficeWriter, only its database query will be available for use. The query fields will appear in a drop-down list on the OfficeWriter toolbar. You will be able to insert these fields as merge fields (data placeholders) in your report template, and will not be able to create additional queries. Whey you save the file, the OfficeWriter template information will be added to the RDL file. The advantages of adding a template to an existing RDL file are:
- Two Display Formats
Render the original report design, or view the report as an Excel file.
* Separation of Report Design Roles
A developer may be responsible for creating shared data sources on the server and defining SQL queries in RDL files. A business user can then open an RDL, insert field placeholders from the predefined queries, and design a report.
Opening a Saved RDL File
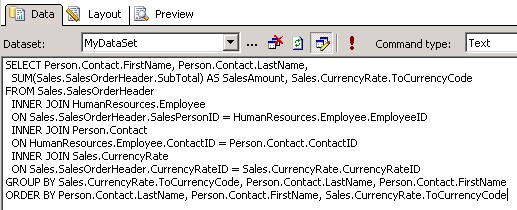
We will open report definition created in Visual Studio and work with it using the OfficeWriter Designer. The report file created in Visual Studio contains the following query:
- Open Excel.
# From the OfficeWriter Designer toolbar, select Open Report.
# Navigate to the .rdl report file created in Visual Studio and open it.
Once your report is open, you will notice the OfficeWriter Designer toolbar has changed. You do not have access to Add Query, Edit Query, or Delete Query because you opened a report definition file that was not created with OfficeWriter.

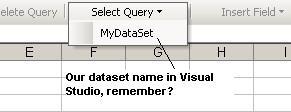
From this point on, all the other OfficeWriter functionality is accessible. To test this, choose Select Query from the OfficeWriter Designer toolbar. You should see the query created in Visual Studio in the list. Choose this query.
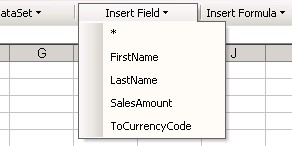
Click Insert Merge Field to reveal the fields created in Visual Studio.
Adding Data Markers to the File
- In cells A1, B1, C1, and D1 respectively, enter the field headers Rep Last Name, Rep First Name, Currency Code, and Sales Amount.
!xlw_addtemplate3.jpg!
# Place the cursor in cell A2.
# Click Insert Field on the OfficeWriter toolbar and select LastName.
# Place the cursor in cell B2.
# Click Insert Field on the OfficeWriter toolbar and select FirstName.
# Place the cursor in cell C2.
# Click Insert Field on the OfficeWriter toolbar and select CurrencyCode.
# Place the cursor in cell D2.
# Click Insert Field on the OfficeWriter toolbar and select SalesAmount.
The report should look like this:
!xlw_addtemplate4.jpg!
\
Publishing and Viewing the Report
- From the OfficeWriter Designer toolbar select Save As.
# Navigate to a local folder where you will store the template report file. This will be where you store your work file in case you want to edit it later, not a location on the Reporting Services server.
# Save the temlate as an RDL file.
# To publish the report, from the toolbar, select Publish.
# From the Publish dialog box select the drop-down to display the Server or URL.
# Choose the server on which Reporting Services is installed.
# Click Refresh.
# Select a folder for which you have publish rights and click Ok.
# If your report published with no errors, you will receive a Publish Successful message dialog. Click Ok to continue.
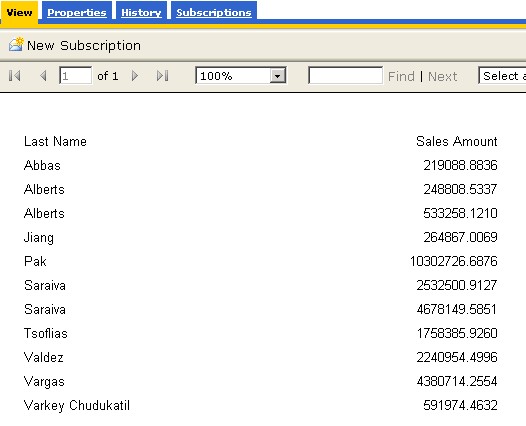
# To view the report, click View on the OfficeWriter Designer. The report viewer will open another Excel window with the report results. It should look like this:
!xlw_addtemplate5.jpg!
# Select Close Report View to return to your report template.
\
View the Report in Reporting Services
We saw how our report looks in Excel using the OfficeWriter Designer View button. But what happens if we go right to Reporting Services Report Manager and view the report from there? In your browser, type the path to the Report Manager (Usually http://<YourReportServer>/Reports). Navigate to the report and view it.
What is different? Why do we have two fields on our report when in OfficeWriter Designer we had four? The report was originally designed in Visual Studio, not OfficeWriter Designer. When the report renders, or displays, in Reporting Services Report Manager, it will display the way it was originally designed in Visual Studio.
To see the report as you designed it with OfficeWriter:
- From the Select a format drop-down list, choose Excel designed by Officewriter.
# Click Export.
# You will be prompted to save or open. To save the report as an Excel file, click Save. To view the report, click Open.
Samples
Download the .rdl file described in this section.

