Table of Contents |
|---|
Setting up the Template
About templates and data markers
A PowerPointWriter template is a PowerPoint presentation that contains PowerPointWriter data markers. A data marker is a line of text beginning with %%= that specifies a database column, variable, or array to insert into the presentation. PowerPointWriter supports data markers embedded in text. Data markers are added to a presentation in PowerPoint and then bound to data sources in code. PowerPointWriter populates the data markers with values from the data sources when the code is executed. Part 1 of this tutorial demonstrates how to use data markers to import single rows of data.
Data marker syntax
The basic syntax for a data marker is %%=[DataSourceName].[ColumnName], where DataSourceName is the name of the data source and ColumnName is the name of the column in the data source. You need to follow these rules when naming data markers:
- Names must begin with a letter (A-Z, a-z)
- The following is a list of characters allowed in data marker names without brackets: ABCDEFGHIJKLMNOPQRSTUVWXYZabcdefghijklmnopqrstuvwxyz1234567890_
- Names must exactly match the names in the data source.
- If a column in a database is 'Street Address', the
ColumnNamemust be[Street Address]to account for the space. Similarly, if a data source name is "DataSource1", the data marker name must beDataSource1or[DataSource1].
- If a column in a database is 'Street Address', the
For more specific information about creating data markers, see How to use Data Markers
Adding data markers to the the template
The template for Part 1 consists of 2 slides populated with text and data markers.
- Open Microsoft PowerPoint and start with a blank .pptx file. Save the file as part1_template.pptx.
- (optional) Set the presentation theme by going to the Design tab and selecting one of the built-in themes.
- A title slide should have been added to the presentation by default. If not, then insert a title slide now.
These will hold our data markers for the title, date and review status of the proposed product.
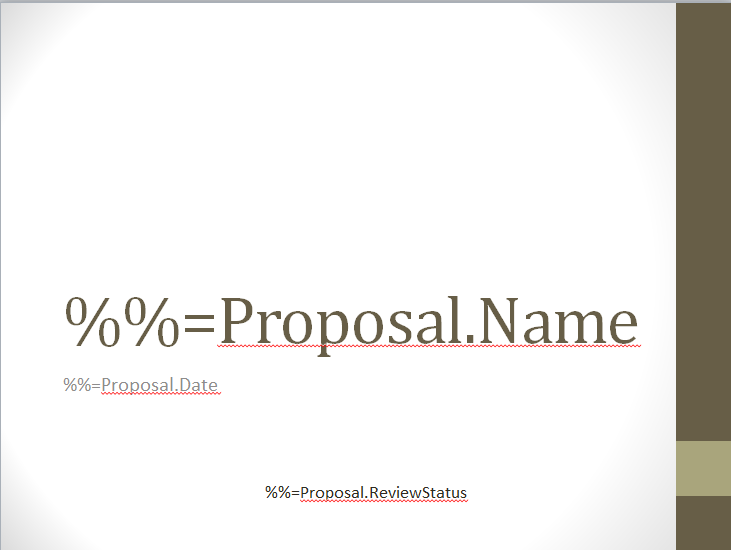
- Populate the title textbox with the data marker
%%=Proposal.Name. When the template is processed, this data marker will get the value from the 'Name' column in the 'Proposal' data source.

- In the subtitle box, add
%%=Proposal.Date.
- Insert a new textbox and place in near the bottom of the slide. This will hold the review status of the project. Type
%%=Proposal.ReviewStatusinto the box. Format with desired font size and formatting.
The final slide should look something like the one below.

- Insert a new content slide. This slide should consist of two text boxes: one for the title and a large one for the body of text.
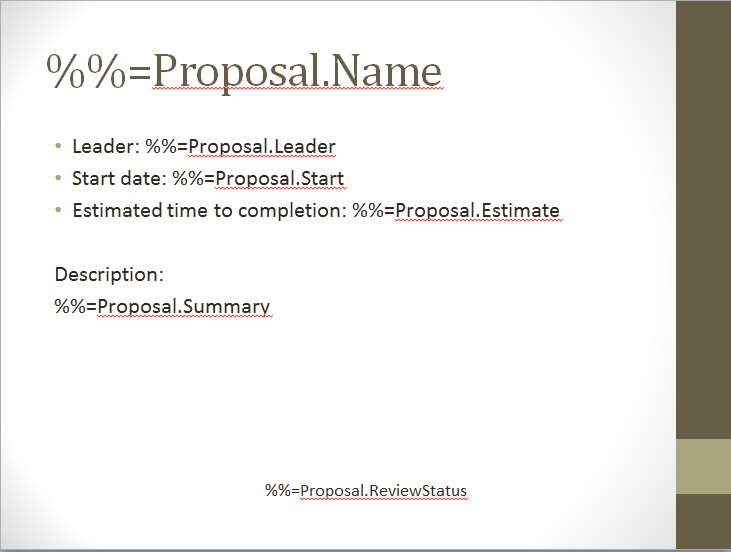
- In the title text box, place the data marker %%=Proposal.Name. Note that this is the same as the data marker used on our first slide, and will be populated with the same data.
- In the large text box add the following text to a list:
- Leader: %%=Proposal.Leader
- Start Date: %%=Proposal.Start
- Estimated time to completion: %%=Proposal.Estimate
- Description: %%= Proposal.Summary
These will contain additional data about our project. PowerPointWriter supports data markers embedded in text, so only one text box is needed for all of our data markers.
The finished slide should look like the one below.

Adding a PowerPointWriter Reference in Visual Studio
Create a .NET project and add a reference to the PowerPointWriter library.
- Open Visual Studio and create a .NET project.
- The sample code uses a web application.
- Add a reference to SoftArtisans.OfficeWriter.PowerPointWriter.dll
- SoftArtisans.OfficeWriter.PowerPointWriter.dll is located under Program Files > SoftArtisans > OfficeWriter > dotnet > bin
Writing the Code
- Include the SoftArtisans.OfficeWriter.PowerPointWriter namespace in the code behind
- In the method that will actually create the presentation, instantiate the
PowerPointTemplateobject. - Open the template file for the presentation.
- Create a DatabindingProperties object for binding data to the template.
- Create an array to hold the values that will appear in the presentation.
- Create a second array that contains the column names. The column names values must match the data markers in the template.
- Bind the data to the template. Make sure the data source name is the same as the name used in the template.
- Call process to import the data into the template and save the file.
Final Code
Downloads
You can download the code for the Basic PowerPointWriter Tutorials as a Visual Studio solution, which includes the Project Proposal.

