
.
Table of Contents |
|---|
This part focuses on using ExcelApplication to create and a coversheet that an image, hyperlinks, and formatted text. It also includes binding data with ExcelTemplate.
Writing the code for the cover sheet comes in two parts. the first part uses ExcelApplication to create a template coversheet; and the second part uses ExcelTemplate to bind the appropriate data to the data markers on the cover sheet.
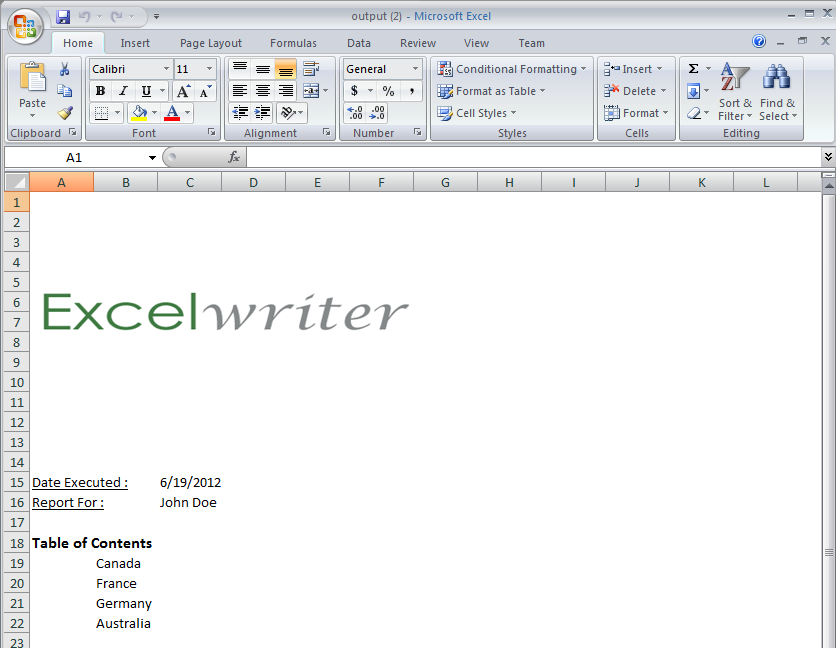
We want to create a cover sheet that looks like the following Excel worksheet:
1. Define a method to contain the ExcelApplication code to create a new worksheet and customize it. In the sample, there is an AddCoverSheet() method that holds the code for the ExcelApplicattion code in this part of the tutorial.
2. You should have already completed Part 1 of this tutorial. To include the AddCoverSheet() method, just add a call in GenerateTemplate()
1. In AddCoverSheet, create a new worksheet called "Summary" at the beginning of the workbook with Worksheets.CreateWorksheet:
2. Select the "Summary" worksheet as the worksheet that will be active when the workbook opens with Worksheet.Select().
3. Hide the gridlines in the summary worksheet using Worksheet.ShowGridlines. By default, this property is set to true.
1. The image will be inserted in cell A1. Adjust the height of row 1 to accommodate the image by retrieving the RowProperties object of row 1:
Note: The row height is set in units of 1/72 of an inch.
2. In the example, the user can select an image to insert into the file. The path of that image is dynamically retrieved and stored in variable imagePath.
3. Create an Anchor in cell A1 with Worksheet.CreateAnchor(). Set the offsets to 0.
4. Then insert the Picture object using Pictures.CreatePicture.
1. Set the Cell.Value of cell A15 to the string "Date Executed :". In cell A16, set Cell.Value to "Report For:". In cell A18, set the Cell.Value to "Table of Contents".
2. Insert the data markers for the "Date Executed" and "Report For" data, which will be imported using ExcelTemplate.
3. Create a GlobalStyle using the Workbook.CreateStyle() method. For more about using styles in ExcelWriter, see Effective Use of Styles.
newcode}}GlobalStyle underlined = wb.CreateStyle();{{newcode
4. Set the Font.UnderlineStyle of underlined to{{UnderlineStyle.Single}}.
5. Create another GlobalStyle called boldAndFont12.
6. Set Font.Bold to true and Font.Size to 12.
7. Create another GlobalStyle called dateForm and use NumberFormat.DateFormat to specify the desired NumberFormat.DateFormat.
8. Apply the underlined style to A15 and A16. Apply boldAndFont12 to A18 and apply dateForm to B15.
9. Next we will add hyperlinks to each of the worksheets in the workbook. To do this, we will use Excel's native HYPERLINK formula to point to the other worksheets. The format for the HYPERLINK formula will be:
=HYPERLINK(\"#DestinationSheet!DesitinationCell\", \"Text\")
This will be set to the Cell.Formula property.
Iterate through the country sheet names using a for loop, excluding the "Summary" and hidden "SimpleTemplate" sheets, which are the first two worksheets in the workbook.
1. Following the lines in the code of Part 1,
string name = TextBox1.Text;
2. Create an string array for the header values and a string array for the column names.
ExcelTemplate can be bound to numerous types of .NET data structures: single variables, arrays (1-D, jagged, multi-dimensional), DataSet, DataTable, IDataReader etc. The source of the data can come from anywhere.
Some of the aforementioned structures have built in column names, such as the DataTable. When working with arrays, which don't have built in column names, you have to define the column names in a separate string array.
3. Use the ExcelTemplate.BindRowData method to bind the web form data to the data markers in the template file (%%=WebFormData.Name, %%=WebFormData.Date) with blank DataBindingProperties.
BindRowData() binds a single row of data to the template, but the data markers in the template do not need to be in a single row.
4. Now run your code.
Here is an example of what the form will look like.
Notice that the countries in the Table of Contents are hyperlinked to the corresponding sheets in the workbook.
You can download the code for the Extended Sales Summary here.
